
Wait 24–48 Hours, Or Pay More: Post Construction Window Cleaning

Hire a specialist when windows carry mortar splatter, hardened silicone, or paint that’s cured for more than a few weeks; DIY is fine for light dust or fresh painter’s tape residue. E and R Cleaning Solutions and similar restoration-focused crews handle the bonded stuff safely, and most homeowners see quotes varying per pane depending on residue severity and access.
TL;DR:
- Residue curing for more than a few weeks requires professional cleaning with specific chemicals and techniques to avoid glass damage.
- Cured mortar, silicone, and paint often bond chemically to glass, making standard cleaners ineffective and increasing repair complexity.
- Proper timing of cleaning after construction trades reduces recontamination and minimizes risk of etching or hazing on coated or tempered glass.
- The cleaning process involves thorough pre-rinse, targeted treatment, mechanical residue removal with plastic scrapers, and verified final inspection.
- Costs are higher than routine cleaning due to dwell times, specialty products, and access equipment, with pricing depending on residue severity and property height.
Table of Contents
- What Makes Post-Construction Window Cleaning Different
- How to Treat Paint, Mortar, Silicone, and Adhesive Residue
- The Technician Workflow: Prep, Test, Treat, Remove, Finish
- When to Schedule the Cleaning Relative to Other Trades
- What Drives the Cost of Post-Construction Window Cleaning
- DIY or Call a Pro? A Decision Checklist
- Safety Standards a Post-Construction Crew Should Meet
- What E and R Cleaning Solutions Sees on Real Post-Construction Jobs
- Why Most Homeowners Underestimate This Job
- Request a Post-Construction Site Survey From E and R Cleaning Solutions
- Sources
What Makes Post-Construction Window Cleaning Different
Post-construction window cleaning is a restoration job, not a wipe-down. Regular window washing deals with dust, pollen, and fingerprints. This work deals with materials that were never meant to touch glass in the first place: paint overspray, mortar dust, silicone caulk, and adhesive film from protective sheeting, all of which bond chemically to the glass surface rather than sitting loosely on top of it.
That bonding is the whole problem. Standard glass cleaner and a cotton rag won’t touch cured mortar. Reach for a metal scraper or the wrong solvent instead, and you risk scratching or etching the glass permanently, especially on coated or tempered panes common in newer builds.
Before deciding whether to call a pro, walk the property and check for:
- Chalky white or gray splatter (mortar or concrete overspray)
- Hazy, semi-transparent film near frame edges (silicone or caulk bleed)
- Speckled or streaked paint dots, often near trim lines
- Sticky residue or a faint outline where protective film was taped down
How to Treat Paint, Mortar, Silicone, and Adhesive Residue
Each residue type demands its own chemistry and sequence. Guessing costs you glass.
- Paint overspray. Fresh paint often softens with an isopropyl alcohol solution or a dedicated paint-release solvent. Let it sit for two to three minutes, then lift with a plastic razor blade held at a low angle. Never use a metal blade on tempered or coated glass.
- Mortar and concrete dust. A mild acid-based cleaner, diluted and tested on a small spot first, breaks down the mineral bond. Rinse thoroughly and neutralize with clean water immediately after contact, since leftover acid residue can etch glass within hours.
- Silicone and caulk residue. Silicone doesn’t respond to acids. A citrus-based solvent or dedicated silicone remover softens it enough for a plastic blade to lift it cleanly.
- Adhesive film. Warm, soapy water with a longer dwell time (five to ten minutes) usually loosens tape adhesive. Stubborn spots benefit from a small amount of mineral spirits on a microfiber cloth.
Pro Tip: Always test any solvent or acid on a hidden corner of the glass first. Coated and Low-E windows react differently than standard float glass, and a bad reaction won’t show up until it’s too late to fix.
When residue has hardened for weeks or the glass shows any cloudiness after a light test, that’s your signal to call in a crew with polishing capability rather than pushing harder with consumer products.
The Technician Workflow: Prep, Test, Treat, Remove, Finish
A reliable crew follows a sequence you can actually verify during a walkthrough, whether you’re a homeowner watching the job or a property manager signing off on it.
Before any water touches the glass:
- Confirm dusty trades (drywall sanding, tile cutting, painting) are complete
- Remove protective window film carefully, checking for adhesive left behind
- Do a quick coating check: run a fingernail lightly across a corner to feel for film buildup, and confirm whether the glass is tempered or Low-E coated, since that changes which chemicals are safe
The actual cleaning sequence:
- Pre-rinse the entire pane with water to remove loose grit before any tool touches the surface. Skipping this step is the fastest way to introduce scratches, since dust particles act like sandpaper under pressure.
- Apply the targeted treatment for the specific residue (solvent, diluted acid, or citrus remover) and let it dwell per the product’s guidance.
- Use a plastic scraper in overlapping, one-direction passes to lift softened residue mechanically. Keep the glass wet throughout; a drying surface regrips debris and makes streaking worse.
- Squeegee top to bottom in overlapping strokes, wiping the blade clean between passes to avoid dragging leftover grit across clean glass.
- Do a final polish pass and inspect at an angle against natural light to catch streaks or missed spots.
Work top to bottom, room to room, so drips from upper panes don’t recontaminate glass you’ve already finished. A five-minute verification walk with a flashlight at a low angle catches the smudges a quick glance misses.
When to Schedule the Cleaning Relative to Other Trades
Timing this wrong is the single most common reason post-construction cleaning turns into a second job. Clean too early and dust from remaining trades resettles on freshly cleaned glass. Wait too long, and mortar or paint residue has more time to cure, raising both the cost and the etching risk.
- Schedule after every dust-generating trade finishes: framing, drywall, sanding, painting, and flooring installation
- Leave 24 to 48 hours after final sanding or plaster work before cleaning begins
- Coordinate directly with the general contractor so window cleaning lands after HVAC commissioning, which often stirs up settled dust
- Book the final clean shortly before the punch-list walkthrough or move-in date, not weeks ahead
Reputable commercial post-construction cleaners build their schedules around these deadlines, aligning with inspections and occupancy dates rather than working in isolation. If your project includes a low-dust installation phase, coordinating with trades like door installers using low-dust methods upstream can meaningfully cut down what your window crew has to remove later.
What Drives the Cost of Post-Construction Window Cleaning
Post-construction cleaning costs more than routine window washing, and the reasons are practical, not padding. Crews spend more time per pane because of dwell times and mechanical removal steps. Specialty chemicals cost more than standard glass cleaner. Liability and insurance coverage run higher on job sites still technically under construction, and access equipment for multi-story properties adds real expense.
Pricing usually follows one of three models, and service-pricing guides commonly reference all three:
- Per pane: Common for standard residential jobs with moderate residue.
- Per hour: Typical for heavily contaminated jobs where time, not pane count, drives cost.
- Per job (flat rate): Common for full-house post-construction packages after an on-site estimate.
Expect these factors to push a quote higher: elevated access requiring a lift or rope work, glass polishing with cerium oxide compound for stubborn mineral deposits, chemical neutralization for acid treatments, and multi-day scheduling on larger properties. A single-story home with light dust and a few paint specks lands at the low end of most estimates. A multi-story property with cured mortar splatter and coated glass requiring polish work lands considerably higher, sometimes requiring a return visit.
DIY or Call a Pro? A Decision Checklist
Light dust, painter’s tape residue, or fresh adhesive film are reasonable DIY territory. Start with warm soapy water and a plastic blade, and stop immediately if you see any haze or scratching develop.
Certain conditions are red flags that call for a trained crew, not a bigger bottle of cleaner:
- Mortar, concrete overspray, or cured construction adhesive
- Residue that’s been sitting for more than 30 days
- Tempered or specialty-coated glass (common in energy-efficient builds)
- Second-story or higher access without proper fall protection
- Any visible etching or haze after a light test
Pro Tip: Before hiring anyone, ask three questions: Can you show proof of insurance? Will you test a small spot before treating the whole window? Do you carry polishing equipment for mineral deposits? A contractor who hesitates on any of these isn’t the right fit for bonded residue work.
Safety Standards a Post-Construction Crew Should Meet
Acids, solvents, and elevated access don’t mix well with guesswork. A reputable crew wears gloves and eye protection when handling acid-based cleaners, rinses and neutralizes chemical residue immediately after use, and never leaves treated surfaces to dry without a final water rinse.
Access matters just as much as chemistry. Ladders work for single-story homes, but multi-story properties often require lifts or rope access, and OSHA and NIOSH guidance on construction site safety exists precisely because fall incidents remain a leading cause of injury on active job sites.
A crew that can’t produce proof of insurance or explain its fall-protection plan on request isn’t one you want on a ladder outside a second-story window, let alone handling acid near tempered glass.
Before booking, ask for documentation, not just a verbal assurance:
- Current proof of liability insurance
- Awareness of OSHA fall-prevention standards for elevated work
- A plan for coordinating with other trades still on site
- Training or certification credentials tied to a recognized industry body
What E and R Cleaning Solutions Sees on Real Post-Construction Jobs
A typical residential post-construction clean runs anywhere from a few hours for a single-story home with light residue to a full day or more for larger properties with heavy mortar splatter or multiple stories requiring lift access. The variation comes down almost entirely to residue severity and access, not square footage alone.
The most common problem panes we encounter are windows near masonry work, where mortar dust has had weeks to cure before anyone calls, and windows where protective film was left on too long, leaving adhesive that’s baked on in direct sun. Both are solvable with the right sequence and patience, but neither responds to a quick wipe.
Every E and R Cleaning Solutions quote includes an on-site assessment, a residue-specific treatment plan, and a clear breakdown of any add-on costs before work starts, following the same professional process homeowners can expect on any standard job, adapted for construction-grade residue.
Why Most Homeowners Underestimate This Job
The biggest misconception I see is treating post-construction cleaning like an upgraded version of spring cleaning. It’s not. The chemistry is different, the risk of permanent damage is real, and the timing window is narrower than most people assume. Homeowners who wait until the final walkthrough to think about window cleaning often end up rushing a job that needed dwell time and careful sequencing.
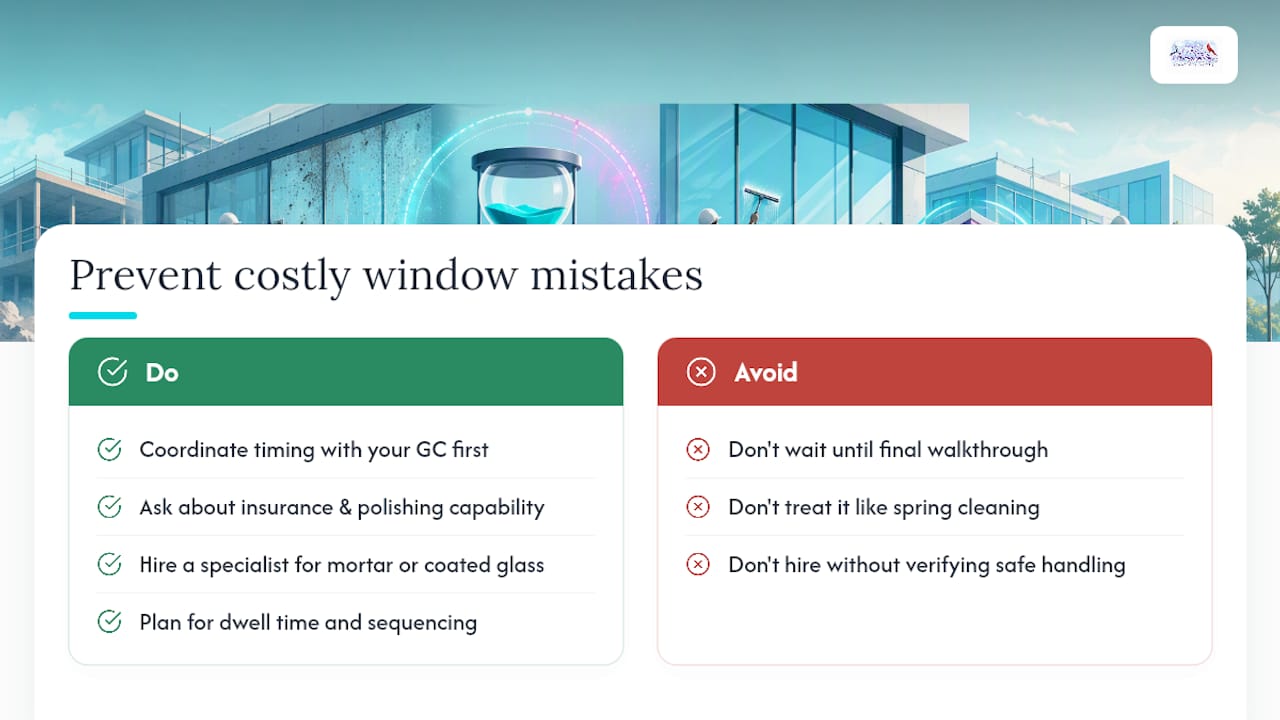
The conventional advice, “just hire a window cleaner,” undersells how specialized this work actually is. Not every window cleaning outfit handles cured mortar or coated glass safely, and asking about insurance or polishing capability upfront saves real money compared to a redo. If I had to pick one priority for readers, it’s this: coordinate timing with your general contractor before you even call for quotes. Getting the sequence right prevents most of the expensive mistakes I’ve seen described in this field, from etched glass to recontaminated panes that needed a second full cleaning.
DIY has its place for light residue, but the moment mortar or coated glass enters the picture, the math favors a specialist every time.
— Richard
Request a Post-Construction Site Survey From E and R Cleaning Solutions
E and R Cleaning Solutions handles the exact scenario this guide walks through: bonded paint, mortar, silicone, and adhesive removal on residential and commercial glass, plus the pressure washing that often needs to happen alongside it on siding, driveways, and entryways. What sets a site survey apart from a phone quote is accuracy. We look at actual residue severity, access requirements, and glass type before naming a price, so there are no surprise add-ons once work begins.

As a licensed and insured, family-run crew, we build every estimate around what your property actually needs rather than a flat per-window rate that ignores mortar splatter or multi-story access. Most residential post-construction jobs get scheduled within a few days of the survey, timed to your contractor’s punch-list deadline. If your project also needs exterior surfaces addressed, our pressure washing services can be bundled into the same visit. Ready to see what your project needs? Request a site survey and we’ll walk the property with you before any chemical touches the glass.
Sources
- How to price window cleaning (Housecall Pro resources)
- Window cleaning after construction or renovation: The complete restoration guide (Scenic View Window Cleaning)