
Pressure Wash Brick Safely for Homeowners: Start Low, Test Patch First
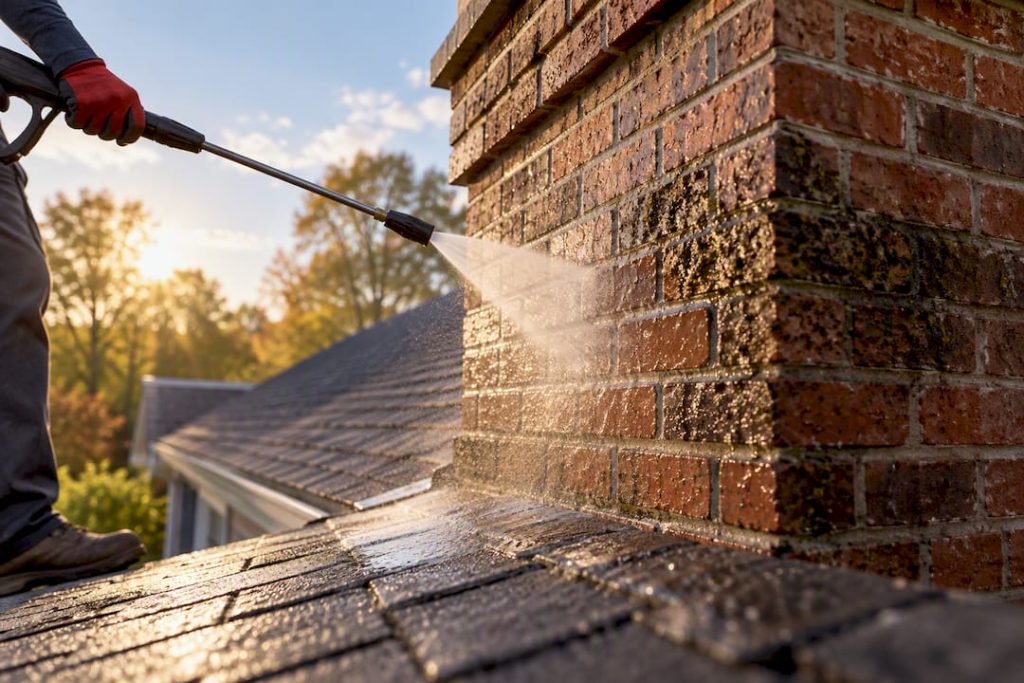
Yes, most exterior brick can be pressure washed safely, as long as it isn’t painted, badly deteriorated, or historic. The single rule that separates a clean facade from a ruined one: start at the lowest pressure that gets the job done, and always run a hidden test patch first. Keep the wand at least 12 inches from the surface. If the mortar is loose or crumbling, or the house is old enough to have historic character, stop and call a professional instead.
TL;DR:
- Use a masonry-approved detergent and avoid muriatic acid unless specifically instructed by a professional.
- Conduct a test patch at low pressure on an inconspicuous area and wait for it to dry before proceeding.
- Avoid pressure washing old, cracked, spalled, or previously sandblasted brick without expert advice to prevent damage.
- Hire a professional if the brick is historic, has loose mortar, or is taller than you can reach safely.
Table of Contents
- Can You Pressure Wash Brick? Check These Signs First
- What PSI and Nozzle Settings Work Best for Brick?
- What Should You Spray on Brick Before Pressure Washing?
- How Do You Pressure Wash Brick Step by Step?
- What Safety Gear Do You Need to Pressure Wash Brick?
- How Do You Deal With Stains, Drying Time, and Repairs After Washing?
- Field Notes From E and R Cleaning Solutions
- A Few Habits That Separate a Clean Job From a Damaged One
- When It’s Time to Call in a Pro
- Sources
- FAQ
Can You Pressure Wash Brick? Check These Signs First
Not every brick surface tolerates a pressure washer, and the checks take five minutes but save you thousands in repairs.
Look for these red flags before you turn on the machine:
- Painted or whitewashed brick — pressure can peel or blast off the coating unevenly, leaving a patchy mess.
- Loose, cracked, or crumbling mortar — water forces its way into gaps and accelerates the damage.
- Spalled brick (chipped or flaking face) — pressure finishes what weather started.
- Reclaimed or previously sandblasted brick — already weakened, and more porous than it looks.
- Homes roughly 80 years or older — Home Depot’s cleaning guidance recommends professional or historic-preservation advice before doing anything to brick this old.
Once the brick clears those checks, pick a hidden spot, low on a wall or behind a bush, and run your planned settings on a patch roughly two feet square. Let it dry completely, then compare it to untouched brick nearby. Wet brick hides erosion and color shift, so judging results while the surface is still damp is a common mistake that leads people to crank up the pressure too soon.
What PSI and Nozzle Settings Work Best for Brick?

Brick tolerance varies more than most people expect. Newer, denser brick handles more pressure than older, softer units, and the difference isn’t always visible until you’ve caused damage.
Pro tip: If you’re not sure how old or dense your brick is, treat it like the older, softer stuff. You can always increase pressure after the test patch; you can’t undo etched mortar.
Home Depot notes many pros work within a wide pressure range for masonry, but higher PSI values are reserved for dense, modern brick after testing confirms it holds up. Softer or older brick often does better at lower pressures within that range.
Flow rate matters just as much as pressure, and it’s the setting most DIYers ignore entirely. Glen-Gery’s technical guidance calls for a minimum of 3 gallons per minute, with 4 to 6 GPM preferred, wherever pressure washing is appropriate at all. Higher flow at moderate pressure cleans more evenly and etches less than a low-flow, high-PSI stream held too close.
Nozzle selection follows the same logic:
- 25° to 40° fan tip for general wall or patio cleaning.
- 15° tip reserved for stubborn spots, used briefly and carefully.
- 0° pinpoint tip almost never belongs on brick; save it for rinsing only, and even then with caution.
Stay 12 to 18 inches from the surface, keep the wand moving in overlapping sweeps, and never let it hover in one spot. A moving wand spreads the impact; a stationary one concentrates it into a groove you’ll be looking at for years.
What Should You Spray on Brick Before Pressure Washing?
Skip the muriatic acid. It’s a common recommendation on forums, but Glen-Gery’s cleaning chemical guidance is clear that acid-based cleaners should only be used when the brick manufacturer and a qualified masonry professional specifically direct it. For routine cleaning, a masonry-approved detergent built for brick and mortar is the safer, standard choice. Dish soap and generic household cleaners either don’t cut through grime effectively or leave residue that streaks when it dries.
For algae, moss, or mildew, use a labeled organic-growth remover and follow the dwell time on the bottle exactly. Letting a cleaner dry on the surface before rinsing is one of the fastest ways to leave blotching that no amount of rinsing fixes afterward.
- Apply cleaning solution with a pump sprayer or the low-pressure “chemical” setting on your washer, never through a high-pressure nozzle. Glen-Gery specifically warns against applying cleaning solution with the pressure washer itself.
- Wet down and cover nearby plants; runoff from masonry cleaners can scorch foliage.
- Close windows, cover vents, and shut off any exterior electrical fixtures near your work area.
Pro tip: A soft-wash approach, low pressure plus the right chemical dwell time, often outperforms brute-force pressure on stained or aged brick. It’s the same logic behind soft-washing siding, and it works just as well on masonry.
How Do You Pressure Wash Brick Step by Step?
Once the test patch confirms your settings, the actual wash follows a predictable sequence.
- Prep the area. Sweep loose debris, move furniture and planters, and cover anything you can’t move. If mortar was recently repointed, give it time to cure fully before applying any water pressure.
- Re-check your test patch. Look at how it dried. If the color held and the surface looks intact, proceed with those settings. If you see any lightening, pitting, or grit in the runoff, drop the pressure another notch.
- Apply cleaner top-to-bottom. Spray the detergent starting at the top of the wall or patio section, letting gravity pull it downward as you work. Give it the label’s dwell time; don’t let it dry.
- Rinse top-to-bottom in overlapping passes. Work the same direction as your application, sweeping the wand steadily rather than blasting one section at a time.
- Watch the runoff. Clean water running off means you’re fine. Gritty, sandy-looking runoff means you’re removing more than dirt, and it’s time to back off the pressure immediately.
- For flat patios and walkways, a surface-cleaner attachment, the spinning bar type shown in Briggs & Stratton’s patio-cleaning demonstration, evens out pressure and eliminates the striping a single-jet wand leaves behind.
Pro tip: If you’re pressure washing brick patio surfaces with joint sand between the pavers, expect to lose some sand in the process. Budget time to re-sand the joints once everything dries.
If at any point the brick looks like it’s losing its face, not just its dirt, stop the job and call a mason before continuing. That’s not a failure; it’s the test patch doing its job late.
What Safety Gear Do You Need to Pressure Wash Brick?
Pressure washers cause more injuries than most homeowners expect, mostly from careless setups rather than the water itself.
Wear eye protection that meets OSHA’s eye and face protection standard, since flying debris and chemical splashback are real risks even on a routine cleaning day. Pair that with gloves, slip-resistant footwear, and hearing protection if you’re running a gas-powered unit for an extended stretch.
- Never climb a ladder while holding a live wand; the recoil can throw you off balance.
- Use an extension wand or rent a scissor lift for tall walls and upper stories instead.
- Secure your hose so it doesn’t snag or trip you mid-pass.
- Keep kids and pets well clear of the spray radius, and shut off or cover any exposed electrical fixtures before starting — following ozongenerátor veszélye: amit mindenképpen tudnod kell a biztonságos használat előtt safety guidelines.
The recoil force from a commercial-grade pressure washer is enough to knock an unbalanced person off a ladder, which is why professional crews almost never work from one while the wand is running.
How Do You Deal With Stains, Drying Time, and Repairs After Washing?
Stubborn spots need a different approach than blasting harder. Oil stains respond better to a degreaser and a poultice treatment left to draw the stain out over a day or two than to repeated pressure passes. Efflorescence, that white, chalky mineral bloom, usually comes off with a mild acidic masonry cleaner and a stiff brush, not a pressure washer at all. Test any stain treatment in a small hidden area before covering the whole surface.
- Patios and walkways cleaned with a surface-cleaner attachment often lose some joint sand; plan to re-sand or repoint once the area dries fully.
- Drying time varies with humidity, sun exposure, and brick porosity, sometimes a full day, sometimes several; judge results only once the brick is uniformly dry.
- Skip the job entirely if freezing temperatures are forecast; water trapped in mortar can freeze, expand, and crack it.
- Call a professional if you’re dealing with historic masonry, visible mortar loss, persistent dampness after drying, or anything that looks structural rather than cosmetic.
Field Notes From E and R Cleaning Solutions
Most brick jobs go wrong for the same reason: someone gets impatient with a test patch and skips straight to full pressure. E and R Cleaning Solutions leans conservative on borderline brick, favoring soft-wash settings over raw PSI, because a slower job that preserves the mortar always beats a fast one that doesn’t. The three mistakes we see most often: holding the wand too close, grabbing whatever detergent is under the sink, and forgetting to wet down nearby plants before spraying. All three are avoidable with five extra minutes of prep.
A Few Habits That Separate a Clean Job From a Damaged One
The jobs that go sideways almost always skip the test patch or rush the dwell time on the cleaner. Neither shortcut saves more than a few minutes, and both can cost you a mortar repair. Keep a short checklist taped inside your garage: test patch first, lowest pressure that works, top-to-bottom application, and check the runoff for grit as you go. Reuse it every season and you’ll rarely be surprised by what comes off the wall.
— Richard
When It’s Time to Call in a Pro
Some brick jobs are genuinely fine for a Saturday afternoon with a rented washer. Others, tall facades, historic masonry, mortar that’s already showing wear, cross the line where a mistake costs far more than a professional visit would have. E and R Cleaning Solutions handles both pressure washing and window cleaning for homeowners and property managers who’d rather not gamble on a facade they can’t easily repair.

The company prices every job individually rather than pushing a one-size package, and the honest-pricing approach shows up in the testimonials from customers who’ve had stubborn stains and hard water marks removed without surprise costs afterward. If your brick has loose mortar, spalling, or is simply too tall to reach safely from the ground, that’s exactly the kind of job worth handing off. Get a custom quote through the pressure washing and window cleaning services page and find out what a professional pass on your brick would actually cost.
Sources
- How to Clean Brick (The Home Depot)
- Glen-Gery technical guidance (Cleaning new brickwork)
- 1910.133 – Eye and face protection. | Occupational Safety and Health Administration
- Cleaning Brick Patios and Walkways with a Pressure Washer (Briggs & Stratton)
FAQ
Is It Safe to Pressure Wash Brick?
Generally yes, if the brick isn’t painted, spalled, or historic, and you start at the lowest pressure setting with a hidden test patch first. Loose or crumbling mortar is the biggest red flag; Home Depot’s guidance recommends professional advice for homes around 80 years or older.
What Do You Spray on Brick Before Pressure Washing?
Use a masonry-approved detergent designed for brick, not household dish soap or muriatic acid. Acid-based cleaners should only be used when the manufacturer specifically directs it, and even then, under a masonry professional’s guidance.
What Is the Best Way to Wash Brick?
The safest method combines low pressure, a fan-tip nozzle held 12 to 18 inches away, and a top-to-bottom application of cleaner followed by a top-to-bottom rinse. Glen-Gery’s guidance recommends 4 to 6 GPM flow with a 30° to 50° fan spray for the best balance of cleaning power and surface safety.
How Long Does Brick Take to Dry After Pressure Washing?
Drying time depends heavily on humidity, sun exposure, and how porous the brick is, ranging from several hours to a full day or more. Wait until the surface is uniformly dry before judging your results, since wet brick can hide erosion or color changes that only show up once it dries completely.
Can E and R Cleaning Solutions Handle Brick Pressure Washing?
Pressure washing for exterior surfaces including brick walls, patios, and walkways is offered, custom-quoted per project. Reach out through the services page for pricing on your specific job.