
Homeowners Should Pressure Wash Before Painting, Wait 24–72 Hours
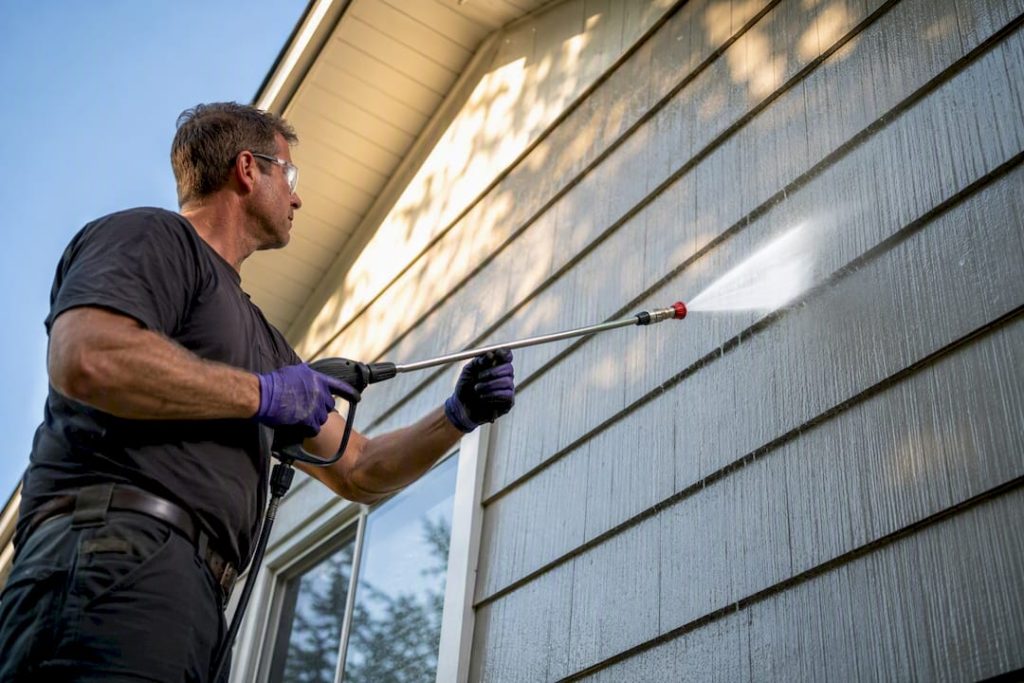
Yes, you should pressure wash before painting, and skipping it is one of the fastest ways to void the life of a paint job. The one condition that matters more than any other: use the right pressure and nozzle for your siding, then let the surface dry fully before a brush ever touches it. Wash too hard and you gouge the material; paint too soon and the finish fails within a season.
TL;DR:
- Using the correct pressure and nozzle is crucial to avoid damaging siding and to ensure proper paint adhesion.
- Washing reveals existing paint failures and structural issues that need addressing before painting, preventing future failures.
- Most homes require 24 to 72 hours of dry time after washing, depending on material, weather, and humidity levels.
- Avoid common mistakes such as washing from ladders, using narrow nozzles, or neglecting post-wash inspections to prevent costly damage and failures.
- Hiring professionals is advisable for multi-story, fragile, or heavily soiled houses to ensure safety, proper technique, and environmental compliance.
Table of Contents
- Why Pressure Washing Before Painting Actually Matters
- How Do You Pressure Wash a House Before Painting?
- Which PSI and Nozzle Should You Use by Material?
- How Long Should You Wait Before Painting After Washing?
- What Are the Most Common Pressure Washing Mistakes?
- Should You DIY or Hire a Pro for Pre-Paint Washing?
- E&R Cleaning Solutions: Field Notes From Pre-Paint Jobs
- What Happens to Wash Water Runoff?
- Final Word on Prepping Your Exterior for Paint
- Let E&R Cleaning Solutions Handle the Wash Before Your Paint Job
- Sources
Why Pressure Washing Before Painting Actually Matters
Paint doesn’t fail because of bad luck. It fails because of what’s sitting on the surface underneath it, invisible to the eye from the sidewalk. Dirt, mildew, algae, and chalking residue all create a barrier between the substrate and the primer, and no amount of premium paint fixes a bonding problem that starts at the surface level.
Chalking is the sneaky one. As old paint ages, it breaks down into a fine, powdery film that rubs off on your hand like dust. New paint applied over chalk bonds to the chalk, not the wall, which means it peels off in sheets within a year or two. Mildew and algae behave differently but cause the same outcome: they create a slick, biological layer that primer can’t grip.
Washing does more than clean. It’s also a diagnostic step. Once the grime is gone, you can actually see what you’re dealing with:
- Rotted trim or fascia boards hiding under a layer of grime
- Failed caulk lines around windows and doors that need to be cut out and redone
- Hairline cracks in stucco or masonry that were invisible when dirty
- Areas of paint that lift or flake the moment water hits them
That last point is worth sitting with. Fine Homebuilding’s guide to pressure washing notes that washing frequently reveals paint that’s already failing, and those spots need scraping and spot priming before a full coat goes on. Skipping the wash means skipping that discovery, and you paint over problems instead of fixing them.
Removing dirt, mildew, algae, and chalking is what makes paint adhere properly to siding in the first place, and it’s the single biggest lever homeowners have over how long a paint job actually lasts. A clean, sound substrate is the foundation everything else depends on.
How Do You Pressure Wash a House Before Painting?
Treat this like surgery, not demolition. The goal is contaminant removal, not paint removal, and the process below keeps you on the right side of that line.
Before you turn on the water
- Walk the exterior and note obvious problem spots: loose siding, exposed nail heads, gaps around trim.
- Cover or tie back plants and shrubs near the house, and soak them beforehand if you’re using any bleach-based cleaner.
- Shut off exterior outlets at the breaker and cover light fixtures, vents, and any exposed electrical with plastic and tape.
- Close all windows and doors tightly, since a straight stream can force water past weak seals.
- Pick an inconspicuous test spot, ideally a back corner, to dial in your pressure and check chemical compatibility before you commit to the whole house.
Equipment and settings
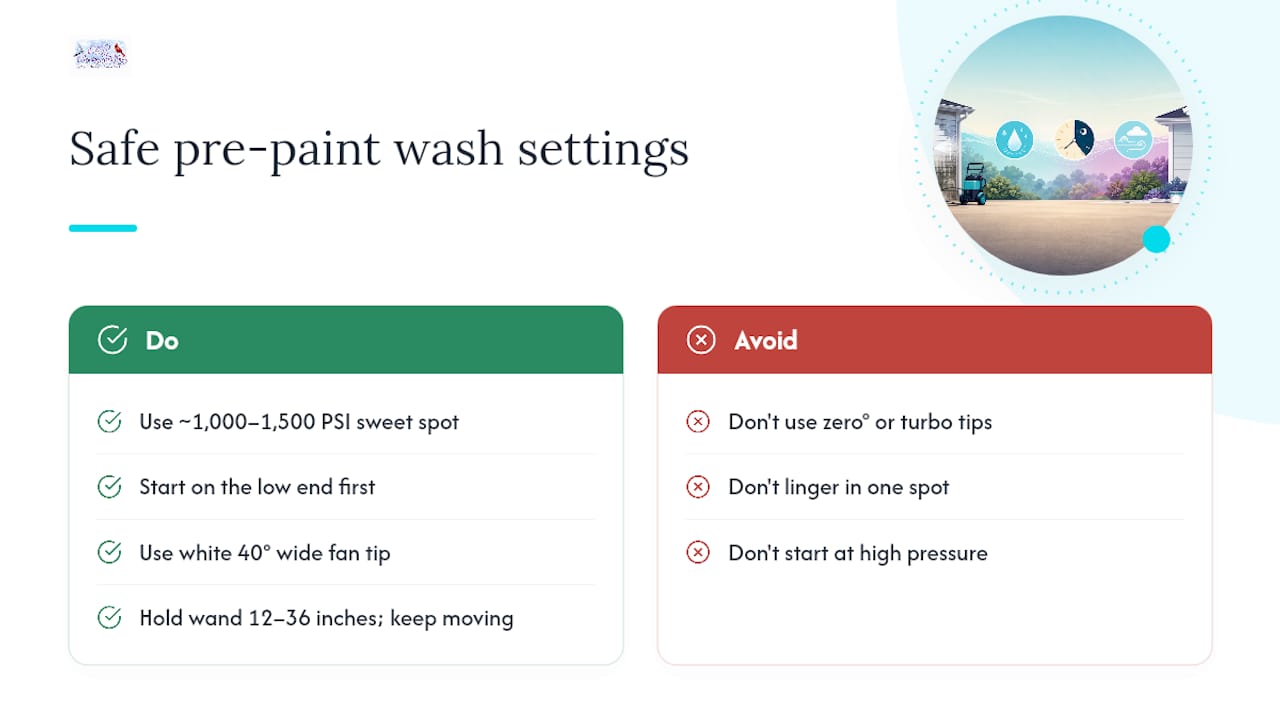
A consumer electric washer in the 1,300 to 1,900 PSI range handles most siding jobs fine. The Spruce’s guidance on washing before painting puts the sweet spot around 1,000 to 1,500 PSI for most siding, with vinyl able to tolerate more, up to roughly 2,500 to 3,000 PSI in some cases. Start on the low end regardless of what your washer can technically do. You can always turn it up; you can’t undo a gouge in wood siding.
Use a wide fan tip, the white 40 degree nozzle, for the entire wash. Skip narrow “turbo” or zero-degree tips entirely for this job. They’re built to strip paint and cut through concrete stains, not prep a wall for a fresh coat. Hold the wand 12 to 36 inches from the surface depending on material, and keep it moving in smooth, overlapping passes rather than lingering in one spot.
Cleaning solutions
For general dirt and light mildew, a mild detergent mixed with water through your washer’s soap dispenser is enough. For heavier mildew and algae, you have two real options: oxygen bleach or a diluted chlorine bleach solution. Oxygen bleach is gentler on landscaping and won’t bleach fabrics or plants the way chlorine can, which makes it the safer default when shrubs are close to the house. Chlorine solutions kill mildew more aggressively but demand more plant protection and a thorough rinse afterward, since runoff needs careful handling either way.
Apply detergent with a low-pressure soap nozzle or a garden sprayer, let it sit for 5 to 10 minutes to break down grime, and never let it dry on the surface. If it dries, you’re left with streaking that’s harder to rinse away than the original dirt.
Washing and rinsing
Work top to bottom in overlapping horizontal passes, letting dirty runoff flow down over sections you haven’t cleaned yet rather than tracking clean water through grime. Rinse each section immediately after the soap dwell time, working in the same top down direction, and finish with a final rinse pass from bottom to top to catch any streaking left behind by dripping detergent.
Pro Tip: Keep the nozzle angled slightly downward or level, never tilted up into siding laps. Water forced upward under lap seams gets trapped behind the cladding, and that trapped moisture is exactly what causes blistering paint months later.
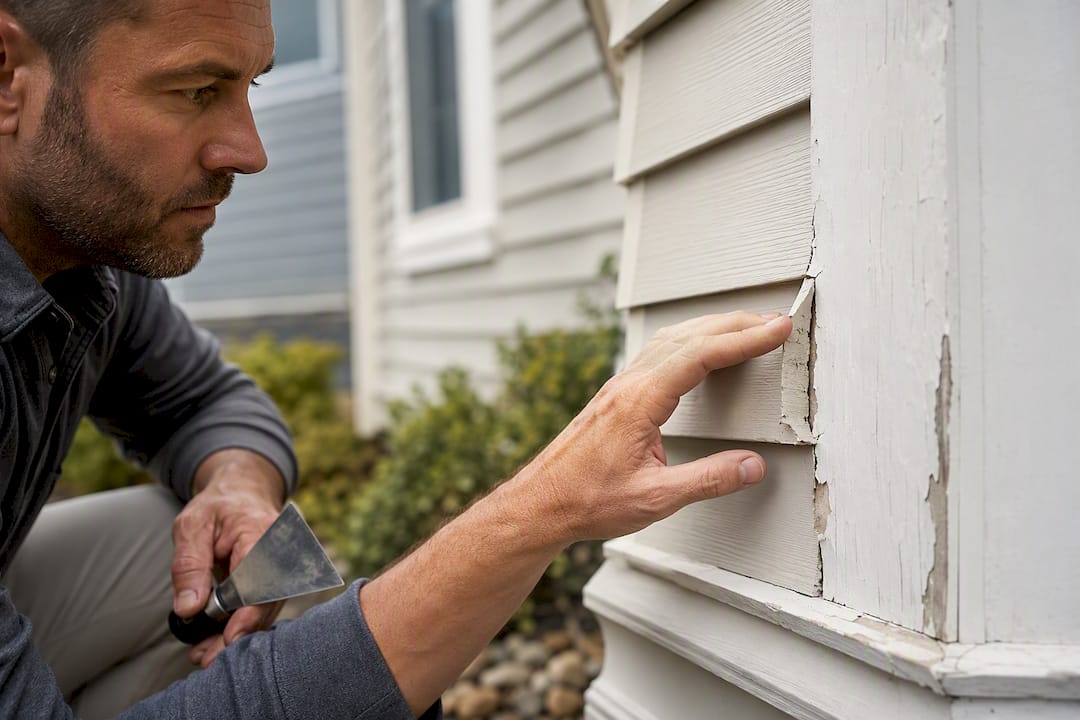
Once you’re done, walk the whole exterior again. Look for spots where paint lifted, edges that curled, or trim that suddenly looks softer than it did dry. Mark those for scraping and spot repair before you move on to drying time.
Which PSI and Nozzle Should You Use by Material?
Not every wall wants the same treatment, and this is where a lot of DIY jobs go sideways. Matching pressure to material is the difference between a clean prep job and an expensive repair bill.
- Vinyl siding: tolerates up to roughly 2,500 to 3,000 PSI with a wide fan tip, but keep the wand moving to avoid melting or warping panels with sustained heat and pressure in one spot.
- Wood siding and trim: stay in the 500 to 1,200 PSI range with a wide nozzle. Wood fibers lift and splinter fast under higher pressure, and once they do, no amount of sanding fully restores a smooth paint surface.
- Fiber cement siding: 1,200 to 1,500 PSI is typically safe, but avoid holding the stream close to seams and joints where water can track behind panels.
- Stucco: keep pressure under 1,500 PSI and hold the nozzle farther back. Stucco is porous, and aggressive washing can etch the surface texture or drive water into the wall assembly.
- Brick and concrete: these can handle higher pressure, often 2,500 to 3,000 PSI, since the material is far more forgiving than wood or vinyl.
Some areas shouldn’t get a direct pressure wash at all. Roof shingles are brittle under a pressurized stream, and a jet can strip the granules that protect asphalt shingles from UV damage. Damaged or already-peeling siding often needs hand cleaning or a soft-wash approach instead of full pressure, since a soft wash relies on chemical treatment and low pressure rather than force. Windows deserve their own gentle process too, since pressure near glass and seals carries a real risk of driving water past the weatherstripping.
The angle rule holds across every material: keep the nozzle pointed down or level, never up into laps, seams, or under trim edges, where forced water becomes trapped water.
How Long Should You Wait Before Painting After Washing?
Drying time depends entirely on what the house is made of and what the weather is doing that week. Angi’s guidance on power washing before painting puts the baseline at 24 to 48 hours under good drying conditions, but that number moves depending on material and climate.
- Vinyl and fiber cement: 24 to 48 hours in warm, dry, breezy weather.
- Wood siding and trim: 48 to 72 hours minimum, since wood absorbs and holds moisture longer than manufactured siding.
- Stucco and masonry: often longer than 72 hours, since porous surfaces trap moisture deep below what you can see.
Humidity, shade, and temperature all push those numbers in either direction. A north-facing wall in humid weather might need an extra full day compared to a sun-baked south wall.
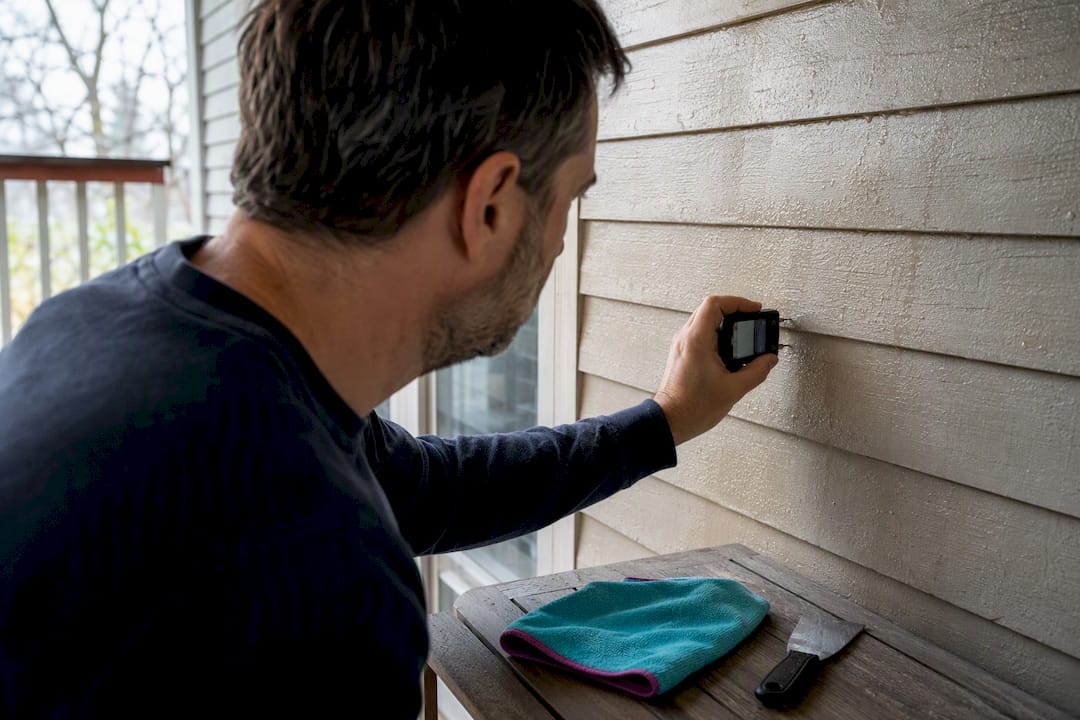
Test readiness with your hand first. Press your palm flat against the surface. If it feels cool or even slightly damp, wait longer. A moisture meter gives a more reliable read, especially on wood, and most hardware stores carry inexpensive pin-style models built for exactly this. If more than two or three weeks pass between washing and your painting date, dust and cobwebs resettle, so give the house a quick fresh rinse right before you start.
What Are the Most Common Pressure Washing Mistakes?
Most exterior paint failures tied to pressure washing trace back to one of a handful of repeatable mistakes, and nearly all of them are avoidable with a little patience.
- Washing from a ladder. Never operate a pressure washer while standing on a ladder. The recoil from the wand combined with ladder instability is a common cause of falls, and an extension wand from the ground handles second-story work far more safely.
- Using a narrow or turbo nozzle on siding. These strip paint and gouge wood. Pressure washing is not meant to be a paint stripper, and forcing that outcome usually damages the substrate underneath.
- Angling the wand upward. This drives water behind siding laps and under trim, where it gets trapped and eventually blisters new paint from behind.
- Skipping the post-wash inspection. Washing frequently loosens paint that was already failing. If you don’t check for it, you paint right over adhesion problems that will reappear within months.
- Ignoring plants and runoff. Chlorine bleach solutions can scorch landscaping fast if you don’t protect or pre-soak vegetation nearby.
Pro Tip: After the whole house dries, run your hand along a few sections of siding, especially spots that looked rough before washing. If paint flakes off under light finger pressure, scrape and spot prime that area before you move forward. Skipping this step is how a one-day wash turns into a two-year paint failure.
Should You DIY or Hire a Pro for Pre-Paint Washing?
Renting a pressure washer typically runs $35 to $75 per day, which sounds cheap until you factor in the learning curve, the time it takes to do a full exterior carefully, and the risk of damaging siding you’ll then have to repair before painting anyway. Professional rates vary by region and house size, often running a few hundred dollars for a smaller home and $400 to $500 or more for a full exterior wash with detergent treatment.
Hiring a pro makes sense in a few specific situations:
- Multi-story homes where ladder work or extension wands over two stories get genuinely risky.
- Fragile or aging siding where you’re not confident judging safe pressure.
- Visible rot, mildew staining that’s spread wide, or paint that’s already peeling in large sections.
- Complex access around dense landscaping, fencing, or tight side yards.
If you do hire out, ask a few pointed questions before booking: Are they insured for property damage? What PSI and nozzle do they plan to use on your specific siding? Do they check for lead paint risk on homes built before 1978, and follow RRP protocols if it’s present? How do they confirm the surface is dry before handing the job back to your painter? A clear onboarding conversation upfront avoids surprises on wash day.
E&R Cleaning Solutions: Field Notes From Pre-Paint Jobs
Every pre-paint wash we run starts with a walk around the property: noting soft trim, checking caulk lines, and covering plants before a drop of water hits the siding. That fifteen-minute step catches most of the problems that would otherwise surface mid-job.
The most common discovery isn’t dirt. It’s caulk that’s already cracked or trim that’s softer than it looks from the ground. We document those spots with photos so homeowners can hand them straight to their painter instead of guessing what needs attention.
On scheduling, we tell every customer the same thing honestly: build in drying days before your painter shows up, and get a written quote before we start so pricing never becomes a surprise on the invoice.
What Happens to Wash Water Runoff?
Wash water carries more than dirt. Detergent residue, mildew treatment chemicals, loosened paint chips, and whatever chalking came off the siding all end up in the runoff, and where that water goes matters more than most homeowners realize.
Storm drains connect directly to local waterways in most municipalities, not to a treatment plant. That means bleach, detergent, and any lead-contaminated paint dust from an older home can flow straight into a creek or storm system if you’re not careful about where you direct the spray. Many local ordinances specifically restrict directing wash water into storm drains for exactly this reason, so it’s worth a quick check with your city before a large job.
The practical fix is straightforward: direct runoff toward vegetated areas or your lawn where it can filter through soil rather than run straight into a gutter or drain. Use oxygen bleach over chlorine bleach when you can, since it breaks down faster and carries less environmental risk once it hits soil or nearby plants. If your home was built before 1978 and you suspect lead paint, treat runoff containment even more seriously, since dislodged paint chips can carry lead into soil and groundwater. A short conversation with your local water authority before a big wash job costs nothing and can save you a fine.
Final Word on Prepping Your Exterior for Paint
Pressure washing before painting comes down to a simple sequence: wash correctly for your material, let it dry fully, and repair whatever the wash reveals. Skip any one of those three and you’re gambling with a paint job that’s supposed to last a decade.
I always tell homeowners to hire out multi-story work, anything with visible rot, or any house they even suspect might have lead paint, following the advantages of airless roof spray painting methods for effective surface preparation. Those aren’t jobs worth learning on. For everything else, patience with drying time matters more than the wash itself, since rushing the paint is what actually ruins the finish, not the washing.
— Richard
Let E&R Cleaning Solutions Handle the Wash Before Your Paint Job
We emphasize the part of this process that’s easiest to get wrong without the right equipment: correct pressure and nozzle selection matched to your specific siding, plant protection before a drop of chemical hits the yard, and a documented dry check before handing the job back so your painter isn’t guessing.

Our pricing is built around transparency, custom quotes with no surprise line items, and flexible scheduling to help your wash line up with your painter’s timeline. If you’re planning an exterior repaint, get a custom quote for your pre-paint wash and we’ll walk your property with you before we ever turn on the water.
Sources
For deeper technique guidance, Fine Homebuilding covers surgical pressure technique and caution around damage. The Spruce breaks down step-by-step safety and equipment settings. Angi covers timing consensus and cost ranges, and Build-Construct walks through practical steps and common mistakes to avoid.
- The Art of Pressure Washing – Fine Homebuilding
- How to Safely Pressure Wash Your House Before Painting – The Spruce
- Should I Power Wash My House Before Painting It? – Angi
- How to Pressure Wash a House Before Painting – Build-Construct