
Why Pressure Washing Protects Paint Longevity Over Time
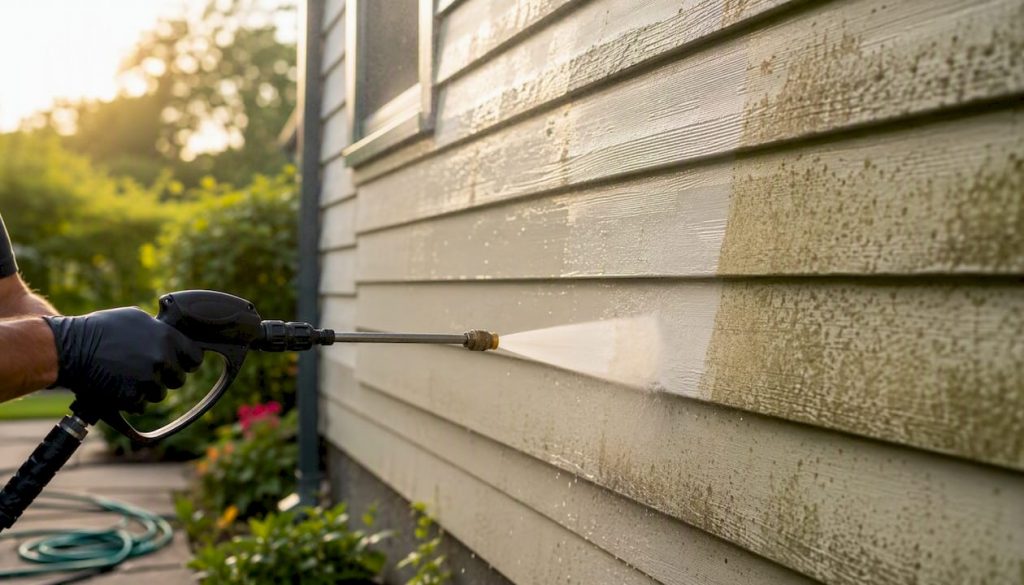
Pressure washing protects exterior paint by stripping away the mold, algae, dirt, salt, and chalky residue that break paint’s bond to the surface underneath it. Once those contaminants build up, they trap moisture against the substrate and chemically attack the paint’s binders, which is why houses that get washed regularly tend to hold their finish years longer than ones left alone. Removing that layer restores clean adhesion and interrupts the moisture cycle that causes peeling and rot.
Here’s the short version of why that matters: paint doesn’t fail because it wears out evenly. It fails at the edges, where dirt and biological growth have already loosened the bond, and it spreads from there. A clean surface gives paint something solid to hold onto instead of a crumbling layer of grime.
Before you schedule anything, run through this:
- Wash exterior siding on a regular schedule, more often in humid or coastal climates.
- Wait at least one to two days for full drying before any paint touches the surface.
- Never point a pressure washer at a painted surface without testing an inconspicuous patch first.
- If your home was built before 1978, stop and check for lead paint before washing.
Pro Tip: On older or delicate siding, ask for a soft wash instead of high-pressure water. Soft washing uses low pressure and a cleaning solution with dwell time to kill mold at the root without blasting paint off the wood.
Key Takeaways
Pressure washing protects paint longevity by removing the biological growth, salt, chalking, and grime that break adhesion and trap moisture against the substrate.
| Point | Details |
|---|---|
| Core mechanism | Removing mold, algae, chalking, and salt stops the chemical breakdown and moisture buildup that cause paint to fail early. |
| Wash frequency | Wash annually in most climates, more often in humid or coastal climates |
| Safe method choice | Use soft washing with low pressure and dwell time on painted surfaces; save high pressure for concrete and brick. |
| Drying time before painting | Wait a minimum of 24 to 48 hours after washing, longer for wood or in humid conditions, before applying paint. |
| When to call a pro | Hire E and R Cleaning Solutions for multi-story homes, suspected lead paint, or when you want calibrated PSI and soft-wash chemistry handled correctly. |
Table of Contents
- How Pressure Washing Prevents Paint Failure: The Mechanics
- Why a Clean Surface Improves Paint Adhesion and Lifespan
- Soft Washing vs High-Pressure Washing: Which One Protects Paint?
- How Often Should You Pressure Wash to Protect Paint?
- Can Pressure Washing Damage Paint? Safe Techniques to Avoid Harm
- DIY vs Hiring a Professional: What Changes the Outcome
- How Long After Pressure Washing Can You Paint?
- Long-Term Savings: How Regular Washing Delays Repainting
- Why Scheduled Washing Belongs on Every Exterior-Maintenance Checklist
- What E and R Cleaning Solutions Offers Homeowners
- Sources
How Pressure Washing Prevents Paint Failure: The Mechanics
Paint doesn’t fail on its own. Something eats it, traps water behind it, or keeps it from bonding in the first place, and pressure washing interrupts all three problems at once.
Mold, mildew, and algae are the most common culprits. These organisms don’t just sit on top of paint. They feed on organic compounds in the paint binder itself, gradually weakening the film until it flakes. Add pollen, road grime, and airborne pollution, and you get a sticky layer that holds moisture against the wall around the clock. Removing that grime and biological buildup helps paint adhere better and last longer, largely because moisture is the enemy paint fights hardest.
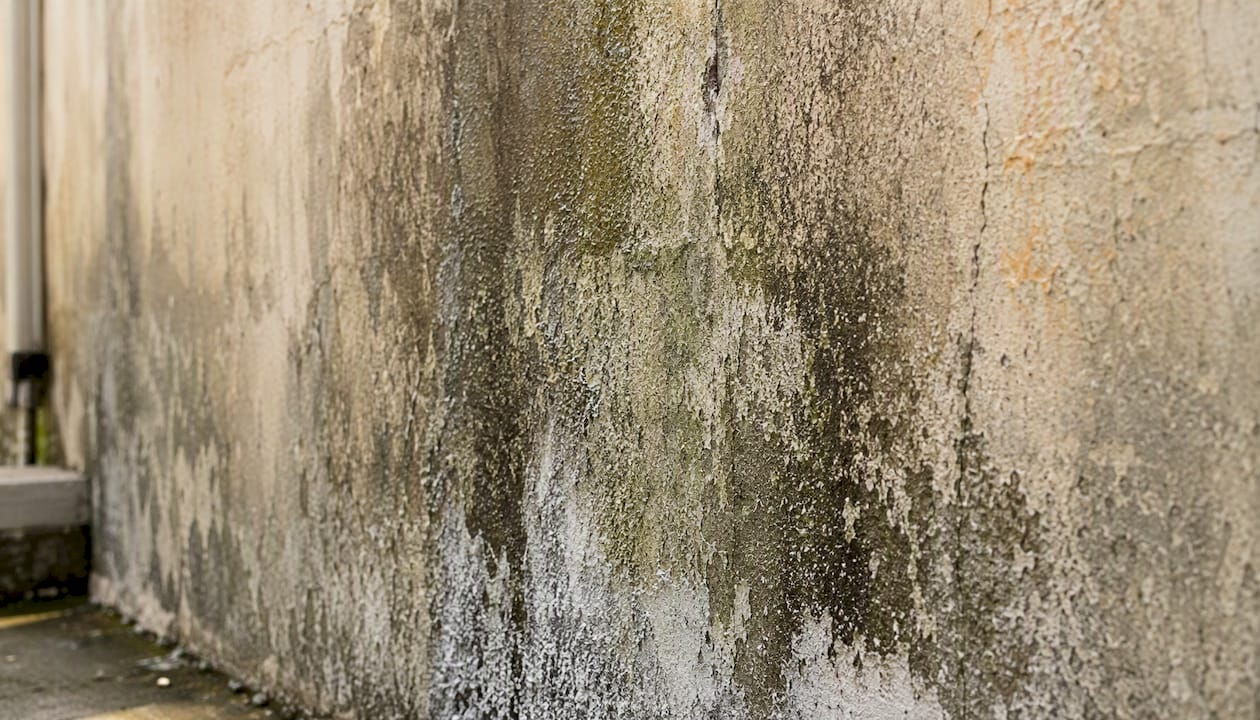
Salt exposure compounds the problem for coastal homes. Salt crystals draw moisture out of the air and hold it against the surface, which accelerates both corrosion on metal fixtures and softening of the paint film. Chalking, meanwhile, is what happens when UV rays break down a paint’s resin over years, leaving a powdery residue that rubs off on your hand. That chalk layer isn’t just cosmetic. It sits between the old paint and anything applied over it, preventing a solid bond.
Here’s how that plays out on an actual house. A homeowner in a shaded, humid lot notices a faint green tint creeping up the north side of the siding. It looks minor. Left alone for two or three years, that algae colony keeps feeding, keeps holding water against the wood, and by year four you’re not looking at a cleaning job anymore. You’re looking at delamination: the paint separates in sheets, sometimes with soft, rotting wood underneath.
The cost of neglect: Routine pressure washing preserves building materials, extends their working life, and helps prevent structural damage from dirt and biological growth, which is why facility managers treat it as maintenance rather than a cosmetic extra.
Trapped moisture is the quiet threat in all of this. Even without visible mold, a film of dirt and pollen holds a thin layer of water against wood or fiber cement siding every time it rains or the dew settles overnight. In freeze-thaw climates, that trapped water expands and contracts with the seasons, stressing the paint film from underneath until it cracks.
Why a Clean Surface Improves Paint Adhesion and Lifespan
Paint bonds to whatever it touches first, not to the wall you think it’s touching. If that first layer is a film of chalk, dust, or mildew, your new coat is bonding to residue, not to your siding.
This is the part painters get insistent about, and for good reason: pressure washing before painting removes dirt, chalking, mildew, and salt so the new coat can bond directly to the substrate instead of a layer that’s going to flake off in a season or two, taking your fresh paint job with it. Chalking is especially deceptive because a wall can look reasonably clean while still coated in that powdery oxidized film. Wipe a hand across old paint and if it comes away dusty, that’s chalk, and no amount of careful brushwork will make paint stick to it permanently.
Pre-paint prep checklist:
- Pressure wash the full surface, including trim, soffits, and any visibly weathered sections.
- Let the surface dry for at least 24 to 48 hours before applying primer or paint.
- Run a test patch on a small section to confirm the surface is clean and fully dry.
- Check weather forecasts for both the wash day and the painting window. Rain or high humidity resets the clock.
Surface prep isn’t a minor line item either. Proper preparation, including pressure washing, is widely considered to account for a large share of how long a paint job ultimately lasts, which is why most reputable painting contractors won’t quote a job without it built in.
Pro Tip: Schedule the wash early in the week if painters are coming that same week. A Monday wash gives siding through Wednesday to fully dry, even in a humid stretch, without pushing the painting crew’s schedule.
Soft Washing vs High-Pressure Washing: Which One Protects Paint?
Not all pressure washing is the same, and using the wrong method on the wrong surface is exactly how homeowners end up with stripped paint or water forced behind their siding.
Soft washing uses low pressure, roughly garden-hose level, combined with a cleaning solution and enough dwell time to kill mold and algae at the root. Professional soft-wash treatments often use sodium hypochlorite paired with a surfactant, which breaks down biological growth more thoroughly than plain water and slows regrowth compared to a rinse-only approach. High-pressure washing, by contrast, relies on mechanical force rather than chemistry, and it’s better suited to hard, non-painted surfaces like concrete and brick that can take the abuse.
The trade-off matters. Aim too much PSI at painted wood siding and you risk forcing water behind the boards, raising the wood grain, or stripping paint that was otherwise sound. Improper high-pressure technique is a well-documented cause of siding and paint damage, which is exactly why professionals adjust pressure and nozzle choice by substrate instead of running one setting on everything.
Soft washing trades brute force for chemistry and patience. It kills what’s causing the damage instead of just knocking the surface of it loose, which is why it’s the standard choice for anything with paint on it.
If your home was built before 1978, stop before you wash anything. Older paint layers can contain lead, and disturbing them with high-pressure water can spread contaminated dust and chips into your yard and gutters. That situation calls for a certified lead abatement specialist, not a rental pressure washer from the hardware store.
How Often Should You Pressure Wash to Protect Paint?
Once a year is the general baseline for most homes, but your actual schedule depends heavily on climate and what’s growing near your house.
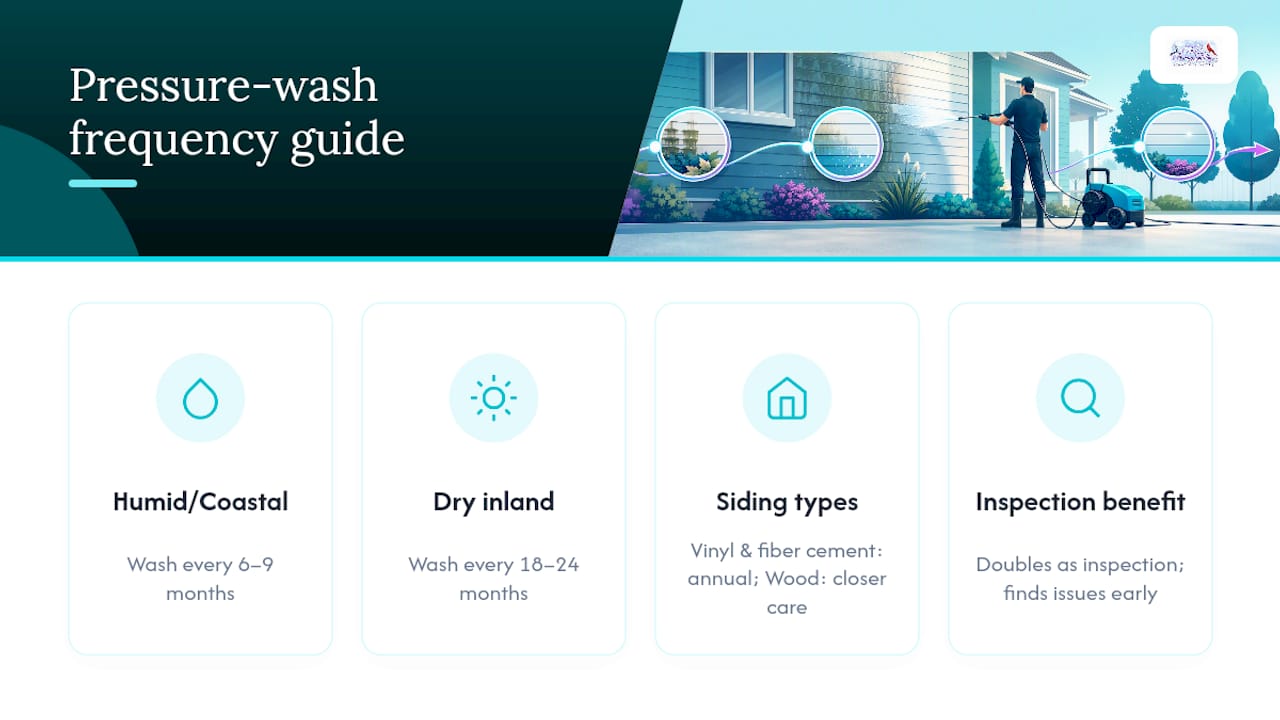
Humid regions, homes shaded by heavy tree cover, and coastal properties dealing with salt spray all push toward more frequent washing, sometimes every six to nine months. Drier inland climates with good sun exposure can often stretch to every 18 to 24 months without much visible buildup. The siding material matters too: vinyl and fiber cement tolerate washing well and can go on a predictable annual cycle, while wood siding needs closer attention since it absorbs moisture and shows algae growth faster.
Beyond the visible cleaning, a routine wash doubles as an inspection. Pressure washing often uncovers hidden problems like loose siding, failed caulk joints, and early paint deterioration that homeowners would otherwise miss until they turned into a bigger repair bill. Catching a failed caulk seam during a routine wash costs you a tube of caulk. Catching it two years later after water has been sneaking behind the siding costs a lot more.
Can Pressure Washing Damage Paint? Safe Techniques to Avoid Harm
Yes, pressure washing can damage paint if it’s done wrong, but the fix isn’t avoiding the wash. It’s dialing in the pressure and technique to match the surface.
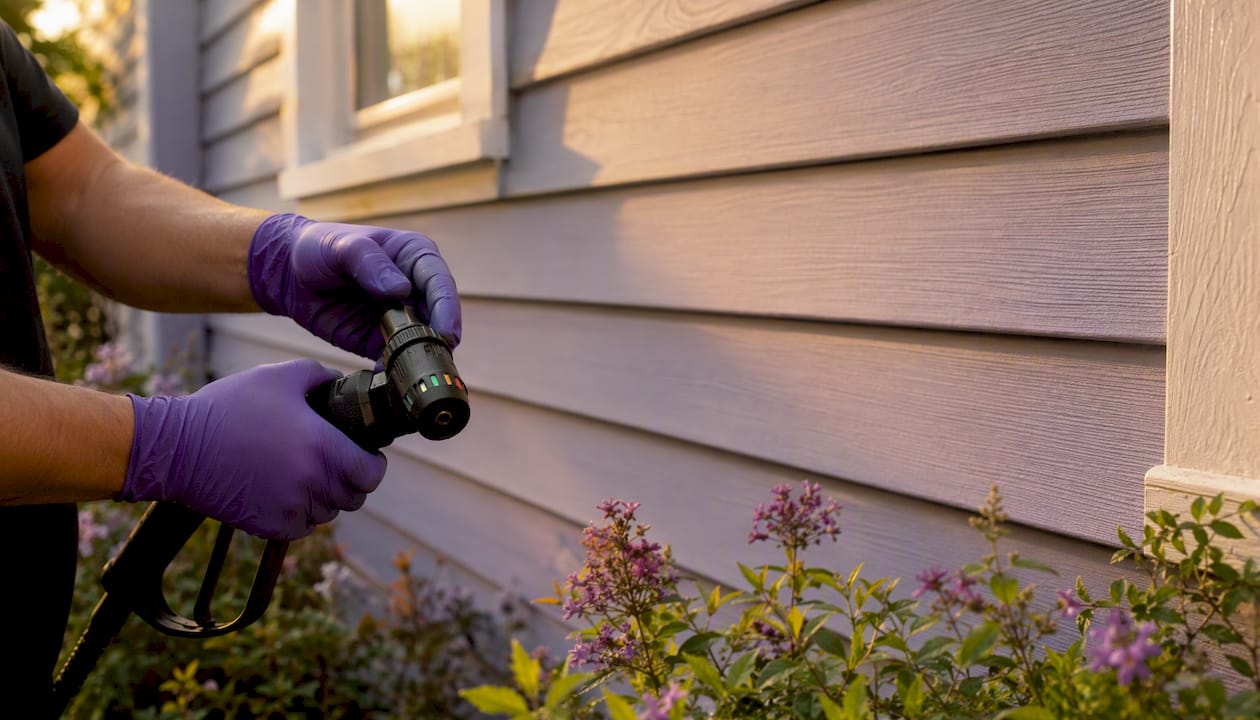
The most common mistakes are predictable: standing too close, using too high a PSI on wood or vinyl, and holding the nozzle at a steep angle that drives water under siding laps instead of across the surface. Professionals avoid these problems by working at a shallower angle, keeping the nozzle 12 to 18 inches from the surface, and starting at the lowest effective pressure before increasing it if needed.
A safer approach, step by step:
- Test a small, hidden patch first at your lowest pressure setting.
- Work from low pressure upward, only increasing if the surface clearly needs it.
- Hold the nozzle at a slight downward angle, following the direction of the siding, never straight into a seam.
- Keep the wand moving. Never let it dwell on one spot.
- Avoid direct spray into window frames, vents, or electrical fixtures.
- Watch for raised wood grain or lifting paint edges. Both mean back off immediately.
Pro Tip: Cover nearby plants and shrubs with a tarp before washing, especially if you’re using a chemical solution. Sodium hypochlorite runoff can scorch grass and flower beds if it pools around the base of the wall.
If you’re not certain your home’s paint predates 1978, treat it as if it might until you check. Disturbing lead paint with high-pressure water is a health hazard, not just a cosmetic risk, and it’s a job for a certified abatement professional, not a weekend project.
Ladder safety deserves a mention too. Two-story homes tempt people into leaning off a ladder to reach a far section rather than repositioning, and that’s how most pressure-washing injuries happen. Move the ladder. It takes thirty extra seconds.
DIY vs Hiring a Professional: What Changes the Outcome
Small, single-story homes with straightforward vinyl or fiber cement siding are reasonable DIY territory if you’re comfortable renting equipment and following safe PSI guidelines. Multi-story homes, older properties with suspected lead paint, or anything with delicate wood trim start tilting toward hiring a professional.
Run through this before deciding:
- How tall is the structure, and would you need a ladder above the second story?
- Is there any chance the paint predates 1978?
- Do you have access to a pressure washer capable of variable PSI and interchangeable nozzles, or just a single fixed setting?
- Does your homeowner’s insurance or a paint manufacturer’s warranty require documented professional cleaning?
What separates a professional result from a DIY one usually isn’t the equipment. It’s the judgment behind it. A trained crew calibrates PSI and nozzle selection to the specific substrate, uses soft-wash chemistry with proper dwell time on biological growth, contains runoff so it doesn’t damage landscaping, and recognizes early signs of substrate rot or loose paint before those turn into a bigger repair. That last part is the one homeowners underestimate most, since spotting a soft spot in siding or a section of paint that’s about to delaminate takes an eye trained on hundreds of similar houses.
E and R Cleaning Solutions has built its process around exactly that kind of substrate awareness, informed by safe pressure-washing practices for painted surfaces and windows and experience applying the same maintenance logic between rental tenancies, where catching paint issues early protects both the property and the landlord’s repainting budget.
A typical single-family home wash takes a professional crew two to four hours, depending on size and how much biological growth needs soft-wash treatment. Compare that against the cost and disruption of a full repaint triggered by paint failure that a $200 to $400 wash could have prevented, and the math tends to favor the wash every time.
How Long After Pressure Washing Can You Paint?
Plan on 24 to 48 hours of dry time before any primer or paint goes on, and treat that as a minimum, not a target.
Humidity, temperature, and how porous the substrate is all stretch that window. Wood siding holds moisture longer than vinyl or fiber cement, and a humid, overcast stretch of weather can push safe painting time out to three or four days even after the surface looks dry to the eye.
Pro Tip: A simple touch test works for most homeowners: press a clean, dry paper towel against the surface. If it comes away with any dampness, wait longer. For a more precise check, a basic moisture meter from a hardware store removes the guesswork entirely.
Scheduling the wash early in the week, as mentioned earlier, builds in that buffer automatically so a delayed drying day doesn’t push your entire painting timeline.
Long-Term Savings: How Regular Washing Delays Repainting
Preventive washing is cheaper than reactive repainting, and the gap between those two costs is bigger than most homeowners assume.
Routine pressure washing extends the working life of building materials and helps prevent the kind of structural damage that comes from unchecked dirt and biological growth, which is the core reason facility managers and commercial property owners build it into scheduled maintenance rather than calling it an optional extra. The same logic scales down to a single-family home.
Consider two homeowners with identical houses built the same year. One schedules an annual wash and touches up caulk and minor paint wear as it’s found. The other skips washing entirely and waits until peeling becomes obvious. The first homeowner spends a modest amount every year on maintenance and stretches their paint job past the decade mark. The second discovers, often around year six or seven, that algae and trapped moisture have already caused delamination across entire sections of siding, and a simple wash won’t fix it anymore. That homeowner is now facing scraping, priming, and a full repaint years ahead of schedule, plus possible wood repair if rot set in underneath.
Preventive maintenance doesn’t feel urgent until you compare it against the alternative. A wash you can schedule on your own timeline is always cheaper than a repaint you’re forced into.
The same principle applies to roofing surfaces, where regular cleaning extends the working life of the material the same way it does for painted siding. Contaminants that sit and feed on a surface don’t discriminate between roof shingles and clapboard.
Why Scheduled Washing Belongs on Every Exterior-Maintenance Checklist
I’d rather see a homeowner wash their siding once a year on a fixed schedule than wait for visible problems to force the issue. Reactive maintenance always costs more, and by the time paint failure is obvious enough to notice from the sidewalk, the damage underneath is usually further along than it looks.
The mistake I see most often isn’t neglect. It’s timing. Homeowners plan a repaint, then treat the wash as an afterthought squeezed in the day before the painters show up, with no buffer for weather or drying time. Build the wash into your calendar the same way you’d schedule gutter cleaning or a roof inspection: on its own cycle, tied to your siding material and climate, not bolted onto a painting project at the last minute.
E and R Cleaning Solutions has spent more than five years working directly with homeowners and property managers on exactly this kind of scheduled exterior care, and we lean on soft-wash chemistry, sodium hypochlorite paired with a surfactant, specifically because it addresses biological growth at the root instead of just rinsing the surface. Used correctly and rinsed properly, it’s a responsible, well-established approach in the industry, not a shortcut.
What E and R Cleaning Solutions Offers Homeowners
If your siding hasn’t been washed in a while or you’re prepping for a repaint, E and R Cleaning Solutions handles the exterior work that protects the paint you already have and sets up the paint you’re about to apply. Our house-wash and soft-wash services cover siding, decks, driveways, and roofs, with pressure and chemistry calibrated to each surface so you get the cleaning without the risk of stripped paint or forced moisture.

We’re a family-run operation built on honest pricing, which means the quote you get reflects your actual property, not a generic package. Customers consistently point to our results on stubborn stains and hard water marks as the reason they come back for recurring service. Scheduling is flexible, and every job starts with a straightforward assessment of what your siding and paint actually need. If you’re getting ready to paint or just want your exterior on a maintenance cycle that protects it, take a look at our safe pressure-washing guide for homeowners and request a quote for your property.
Sources
- Pressure Washing: The Secret to Building Longevity | Facility Management
- How to pressure-wash a house | Popular Mechanics
- Why Pressure Washing Helps (Angi)
- Why Pressure Washing Is Required Before Exterior Painting | 1st Coast Painting
- Pressure Washing Before Painting | WHOA Paintings