
Homeowners: Avoid a $400 Window Repair, Remove Paint Overspray Safely
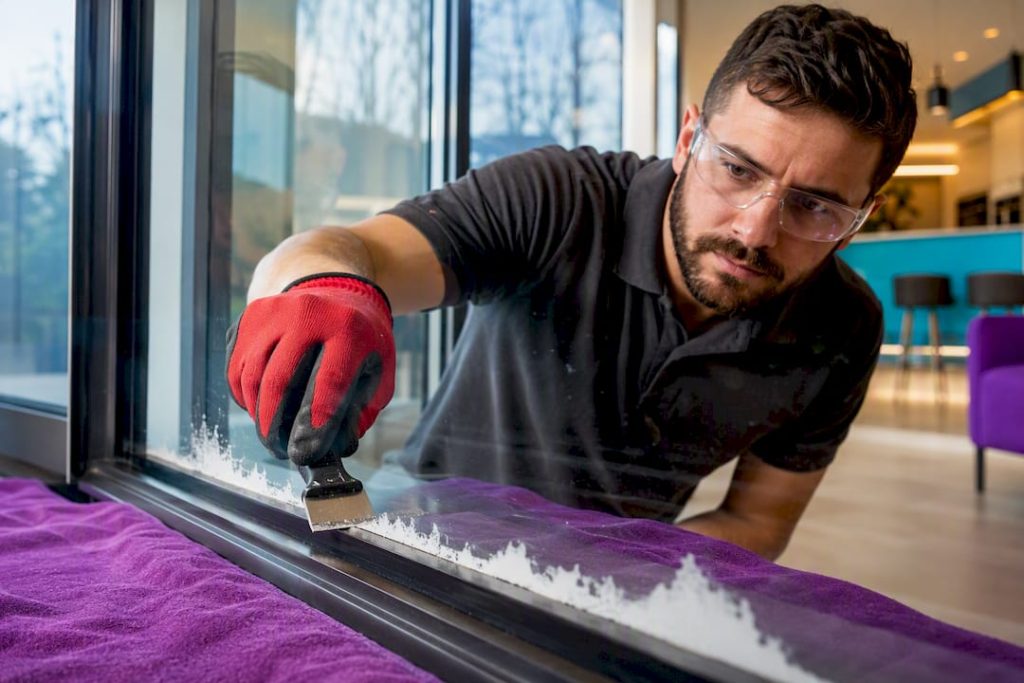
Softening the paint with a solvent matched to its type, keeping the glass lubricated, then lifting it with a window-rated blade held at a shallow angle removes most overspray without scratching. Spot-test the solvent first, wear gloves and eye protection, and work in a ventilated space. Done patiently, this avoids the cost of glass replacement entirely.
TL;DR:
- Use the correct solvent based on paint type, with isopropyl alcohol for latex and acrylics, and acetone for oil-based or spray paints, testing on a small area first.
- Hold the blade at a 30 to 45 degree angle, scrape in one controlled direction, and keep the glass wet to prevent scratches during paint removal.
- Always wear gloves and safety glasses, work in a ventilated area, and mask surrounding frames and sills before starting to avoid damage and exposure to fumes.
- Dull blades, dry scraping, and rushing the process are the main causes of glass scratches; replace blades frequently and work patiently.
- For complex cases or high-risk glass types like coated or insulated windows, professional removal services reduce the risk of damage and ensure proper technique.
Table of Contents
- What Tools and PPE Do You Need Before Starting?
- Step-by-Step: How to Remove Paint Overspray From Window Glass
- Which Solvent Works Best for Latex, Oil-Based, or Spray Paint?
- How Do You Scrape Paint Off Glass Without Scratching It?
- How Can You Prevent Paint Overspray on Windows in the First Place?
- When Should You Call a Professional for Overspray Removal?
- How Do You Handle Tempered, Laminated, or Coated Glass Safely?
- How Do You Dispose of Paint Solvents and Residue Safely?
- Why Most Overspray Advice Skips the Part That Actually Matters
- Get Professional Overspray Removal From E and R Cleaning Solutions
- Sources
What Tools and PPE Do You Need Before Starting?
Before touching a single drop of overspray, gather the right kit. Half the scratches homeowners cause on their own glass come from grabbing whatever is in the garage instead of a purpose-made tool.
Here’s what actually belongs on your work table:
- A window-rated razor scraper with fresh, single-edge blades (buy a multi-pack, you’ll swap blades often)
- A plastic putty scraper or clay bar for lighter overspray where metal isn’t necessary
- Isopropyl alcohol, acetone, or mineral spirits, chosen based on the paint type (covered below)
- Microfiber cloths for solvent application and final polishing
- A spray bottle of soapy water to keep the glass lubricated during scraping
- Nitrile gloves and safety glasses, since solvents and airborne paint chips both irritate skin and eyes
- Painter’s tape and plastic sheeting to protect frames and sills while you work
Ventilation matters more than most people assume. Acetone and mineral spirits release fumes that build up fast in an enclosed room, so crack a window on the opposite side of the house or work outdoors when possible.
Before you start the real removal work, clean the glass of loose dust and grit with plain water. Anything gritty trapped under your scraper turns into a scratch generator. Tape off the frame edges, especially on painted wood or vinyl, and lay plastic sheeting below the sill to catch drips.
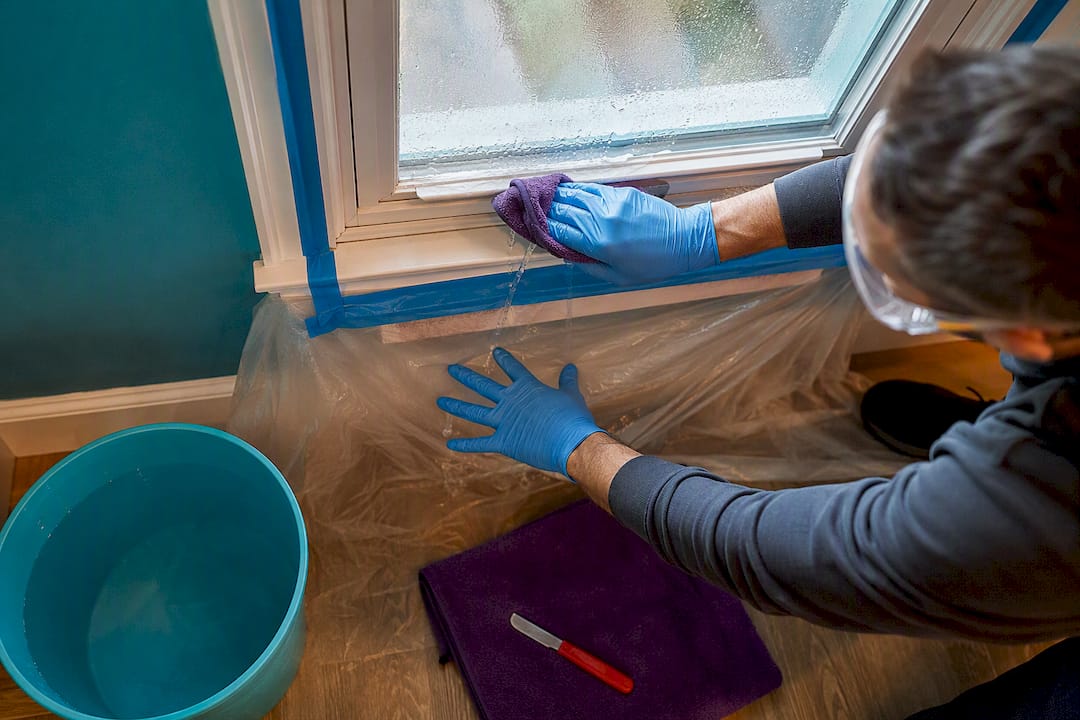
Then run a spot test. Pick an inconspicuous corner of the glass, apply a small amount of your chosen solvent, wait the recommended dwell time, and check for haze, clouding, or frame discoloration before treating the whole window. Skipping this step is the single most common cause of avoidable damage during DIY window cleaning projects.
Step-by-Step: How to Remove Paint Overspray From Window Glass
This sequence works whether you’re dealing with a light dusting from a fence-painting job or a thicker splatter from a spray-painted door nearby.
- Dry-wipe loose flakes first. Run a soft cloth or plastic scraper over the surface to remove any paint that hasn’t bonded yet. This step alone often clears a significant portion of light overspray with zero solvent needed.
- Apply your solvent generously. Soak a cloth and lay it against the paint, or spray directly onto the glass, covering the full affected area.
- Let it dwell. For rubbing alcohol on latex or acrylic paint, give it roughly two minutes before testing whether the paint has softened. Oil-based paints typically need longer contact time.
- Keep the surface wet while you work. Mist with soapy water as you go. A dry blade on dry glass is exactly how homeowners end up with hairline scratches across an otherwise clean pane.
- Scrape in one direction. Hold the blade at roughly a 30 to 45 degree angle and push in single, controlled passes rather than sawing back and forth.
- Wipe the blade constantly. Paint residue that builds up on the edge turns your scraper into sandpaper. Wipe it clean every two or three passes.
- Reapply solvent as needed. Stubborn spots may need a second soak. Resist the urge to press harder instead.
- Clean the residue. Once the paint is gone, wash the area with soapy water to neutralize any leftover solvent, then dry with a lint-free cloth.
- Inspect under direct light. Angle the glass toward sunlight or a bright bulb to catch any missed specks or faint film before calling the job done.
- Finish with a proper glass cleaner for a streak-free result that matches the rest of the window.
Pro Tip: Work window by window, not room by room. Solvent that sits too long on one section while you wander off to start another dries out, and reapplying wastes both time and product.
The whole process, according to stepwise cleaning guides that professionals also follow, works because cured paint is really just a polymer film sitting on top of the glass. The solvent re-liquefies that film enough for the blade to lift it, and since glass itself doesn’t absorb or react with the solvent, you’re only removing what shouldn’t be there.
Which Solvent Works Best for Latex, Oil-Based, or Spray Paint?
Matching solvent to paint chemistry is the difference between a clean lift and a frustrating hour of scrubbing that barely touches the surface. Latex and acrylic paints respond well to isopropyl alcohol because their water-based binders break down quickly with mild solvents. Oil-based paints and most spray paints have tougher resin structures, so acetone or a dedicated paint stripper works better there. Mineral spirits sit in between: gentler than acetone but stronger than alcohol, and a good choice when you’re unsure which paint type you’re dealing with.
A rough guide to get you started:
- Latex or acrylic overspray: isopropyl alcohol, dwell time around two minutes before testing softness
- Oil-based paint: acetone or a solvent-based paint remover, longer dwell time, more frequent reapplication
- Spray paint (aerosol): acetone typically outperforms alcohol, though always test a small area first
- Unknown or mixed paint type: start with mineral spirits, the gentler middle ground
For heavy oil-based buildup that won’t budge with standard solvents, chemical strippers or careful heat application become options, but both carry higher risk to window frames and insulated glass units and are better treated as escalation tactics for stubborn cases rather than a starting point.
Always test on a small, hidden section before committing to the whole pane. Vinyl and painted wood frames can discolor or soften with acetone exposure, so keep application minimal and wipe away any excess that drips onto the frame immediately. Use the smallest amount of solvent that gets the job done, and work in a ventilated area regardless of which product you choose. For readers who want a deeper look at how different solvents interact with cured polymer coatings, this solvent compatibility guide breaks down the chemistry in more detail.
How Do You Scrape Paint Off Glass Without Scratching It?
Blade technique separates a spotless result from a window covered in fine scratches that catch light at every angle. The two variables that matter most are angle and lubrication, and most DIY damage traces back to getting one of them wrong.
Hold your blade at 30 to 45 degrees relative to the glass. Too flat and you’ll dig into softened paint without lifting it cleanly; too steep and the blade edge gouges the surface. A window-rated razor scraper with a fresh blade, moved in single passes in one direction, is the standard here.
Reach for a plastic scraper or clay bar first if the overspray is light. Clay-based removal is a genuinely non-aggressive option that professional detailers and glaziers use precisely because it lifts surface paint without any metal-to-glass contact at all. Save the metal blade for paint that clay or plastic can’t budge.
A few rules worth committing to memory:
- Keep the glass wet with soapy water throughout, never scrape dry
- Wipe the blade every two or three passes to clear paint buildup
- Swap blades the moment you feel resistance or see nicks in the edge
- Work small sections at a time rather than one long sweep across the whole pane
Pro Tip: Dull blades and dry scraping are the two most common causes of permanent glass damage. A fresh, sharp blade on a wet surface does the work; a dull one just drags.
Steel wool and coarse scrub pads have no place in this process. I-CAR’s technical guidance specifically warns against steel wool because it can leave behind metal fibers that corrode and stain the surrounding glass and frame over time, on top of the scratches it causes directly. If a tool feels aggressive enough to worry about, it probably is.
How Can You Prevent Paint Overspray on Windows in the First Place?
The fastest overspray removal is the kind you never have to do. A little prep before you paint saves hours of scraping afterward.
Mask windows completely with plastic sheeting and painter’s tape, sealing every edge rather than draping plastic loosely over the frame. Wind carries overspray farther than most people expect, so check the forecast and avoid spraying on breezy days when drift can travel well past your intended target.
Technique matters too. Hold the sprayer at a consistent distance and angle, and consider switching to a roller or brush for any surface within a few feet of glass. The control you gain outweighs the time you save with a sprayer in tight spaces.
Quick habits that pay off:
- Tape and sheet every window fully before spraying, no gaps
- Check wind conditions before starting any spray job
- Walk the area immediately after painting to catch and wipe wet overspray before it cures
- Switch to roller or brush application near windows, fences, and other glass surfaces
Wet paint wipes away with a damp cloth in seconds. Once it cures, you’re back to solvents and blades.
When Should You Call a Professional for Overspray Removal?
Some jobs are worth handing off. Large-area overspray, windows on a second story or higher, tinted or coated glass, and older frames prone to damage all raise the stakes considerably. A slip on a ladder or the wrong solvent on a low-E coating can cost far more than the removal job itself.
Professionals bring equipment and product access most homeowners don’t have on hand, along with the experience to judge dwell times and blade pressure by feel rather than guesswork. That judgment call, built from repetition, is where trained technicians consistently outperform a first attempt.
E and R Cleaning Solutions has spent more than five years handling exactly these situations for homeowners and property managers who’d rather not risk a $400 window pane over a $40 mistake. The approach is straightforward: assess the glass and frame type onsite, choose the safest solvent for that specific situation, remove the paint with controlled blade work, and finish with a full polish. If your overspray involves upper-story windows or coated glass, our specialized cleaning approach is built for exactly that risk profile.
How Do You Handle Tempered, Laminated, or Coated Glass Safely?

Not all window glass behaves the same way under a blade, and knowing which type you’re working with changes your approach.
Tempered glass, common in doors and low-level windows, is more resistant to impact but can still scratch under a dry blade just as easily as standard glass. The tempering process doesn’t protect the surface from abrasion, only from breakage, so the same lubrication rules apply.
Laminated glass, often used in skylights or storm-prone regions, has a plastic interlayer bonded between two glass panes. Solvent that seeps into edge seals through excessive dripping can weaken that bond over time, so keep application controlled and wipe excess before it pools at the frame line.
Coated or tinted glass, including low-E energy-efficient windows, carries a thin metallic or ceramic film on one surface, usually the interior-facing side. Acetone and strong solvents can strip or cloud that coating permanently. For these, start with the mildest solvent and a plastic scraper rather than jumping to acetone, and test in a corner where any coating damage would be least noticeable.
Insulated glass units, the double or triple-pane windows in most modern homes, add another wrinkle: excessive heat from a heat gun can compromise the seal between panes, leading to fogging months later. If you’re not certain which glass type you have, treat it as coated and delicate until proven otherwise.
How Do You Dispose of Paint Solvents and Residue Safely?
Solvents and scraped paint residue don’t belong in a household trash bag or down a drain. Isopropyl alcohol, acetone, and mineral spirits are all flammable and can contaminate groundwater if poured outside or into a storm drain.
Let used solvent-soaked rags dry completely outdoors, away from any heat source, before disposal, since damp solvent rags can combust under the right conditions. Once dry, most municipalities accept them as regular trash, though some hazardous waste programs prefer them separately.
Scraped paint chips should be swept up and bagged rather than hosed off into your yard or a storm drain, particularly if the paint predates the 1970s and might contain lead. Leftover liquid solvent goes to a household hazardous waste collection site, never down a sink. Most counties run periodic drop-off events specifically for paint, solvents, and similar materials. Check your local municipal waste website before your project, so you’re not stuck storing open containers longer than necessary.
Why Most Overspray Advice Skips the Part That Actually Matters
Most guides treat overspray removal as a solvent problem. It’s really a patience problem. The chemistry of softening paint is straightforward once you match the solvent to the binder, but the actual damage to glass almost always happens in the thirty seconds after that, when someone gets impatient and starts pressing harder or scraping dry because the paint isn’t lifting fast enough.
Conventional advice underweights blade maintenance. Homeowners fixate on solvent choice and rush past the fact that a dull blade dragged across softened paint causes more scratches than the wrong solvent ever would. If you take one thing from this guide, let it be this: keep the glass wet and swap your blade before it feels like it needs swapping, not after.
The other gap is knowing your own limits. Coated glass, high windows, and large jobs aren’t places to learn technique through trial and error. That’s not a knock on DIY, it’s just where the cost of a mistake stops being worth the money saved.
— Richard
Get Professional Overspray Removal From E and R Cleaning Solutions
E and R Cleaning Solutions handles the overspray jobs where the risk of a scratched pane or a damaged frame outweighs the appeal of doing it yourself. Every visit starts with an onsite assessment of your glass and frame type, followed by careful solvent selection, controlled blade removal, and a final polish that leaves the window streak-free.

Every job gets a custom quote based on the actual scope of work, not a generic flat rate that ignores how much overspray you’re dealing with or how many windows are affected. Our family-run team has spent over five years building a reputation on honest pricing and careful handling of both residential and commercial properties. If your project also involves overspray on siding, decks, or driveways, our pressure washing services cover that ground too.
Request a free estimate today and find out what a professional overspray removal actually costs for your specific windows.
Sources
- I-CAR RTS: Overspray removal and clay usage
- How to Remove Spray Paint from Glass | Stain Removal Guides
- How To Remove Paint From Glass: A Step-by-Step Guide