
Homeowners: Remove Brick Efflorescence Without Acid or Pressure Washing
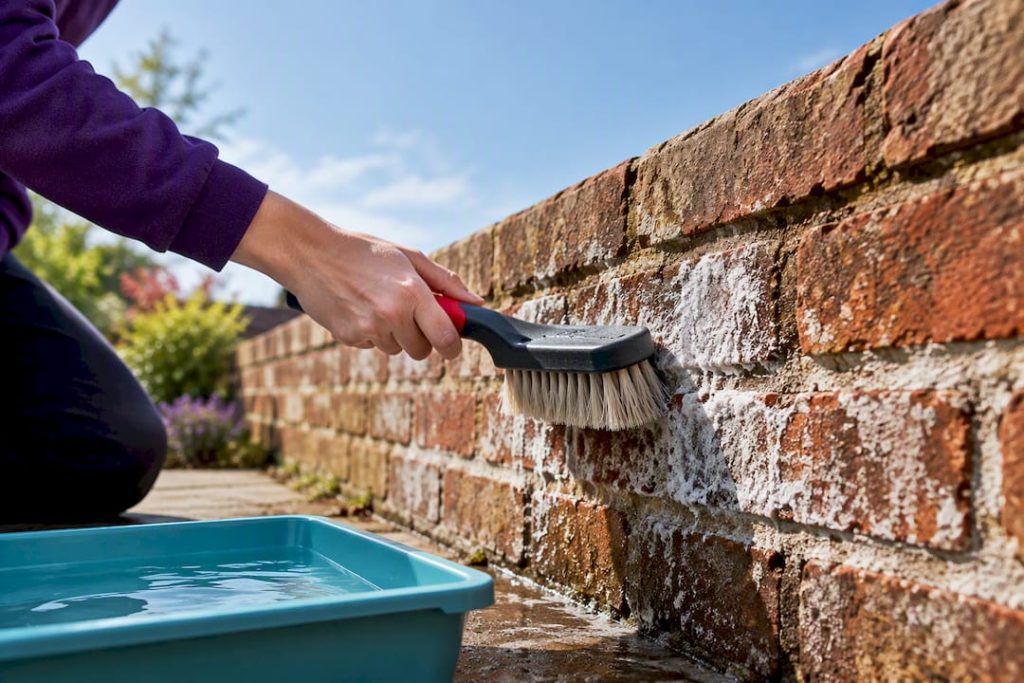
Most efflorescence comes off brick with nothing more than a stiff dry brush and a garden hose. Start there before reaching for anything stronger, and check your gutters, flashing, and grading while you’re at it, since those white deposits almost always trace back to water getting into the masonry somewhere. Save acid washes and pressure washers for genuinely stubborn cases, or hand those off to a professional.
TL;DR:
- Light efflorescence on new brick often disappears within a year with normal weathering, but persistent or crusty deposits indicate ongoing water intrusion.
- Water sources like leaking flashing, faulty gutters, misdirected irrigation, or rising damp usually drive efflorescence reoccurrence and must be addressed for permanent fix.
- Gentle cleaning starts with dry brushing and rinsing; acid washes and pressure washing should be last resorts due to potential damage to brick and mortar.
- Sealing and water repellents can trap moisture if applied prematurely; repairs to flashing, grading, and mortar are critical to prevent return.
- Professional diagnosis and low-pressure, targeted cleaning approaches are recommended for stubborn or recurring efflorescence to avoid unintentional damage.
Table of Contents
- What Causes Efflorescence on Brick, and Is It New-Building Bloom?
- What Causes Water Intrusion Behind Brick Efflorescence?
- How Do You Remove Efflorescence From Brick Step by Step?
- How Do You Stop Efflorescence From Coming Back?
- When Should You Call a Professional for Efflorescence Removal?
- What Safety Steps Matter Most Before You Clean?
- How Often Should You Inspect Brick for Efflorescence?
- Get a Professional Assessment for Stubborn Brick Stains
- Where to Find More Technical Guidance on Efflorescence
- Sources
- FAQ
What Causes Efflorescence on Brick, and Is It New-Building Bloom?
Efflorescence is a crust or powder of water-soluble salts, mostly calcium and magnesium sulfates, left behind when moisture inside the brick or mortar evaporates at the surface. The water dissolves salts as it moves through the masonry, then deposits them on the outside once it evaporates, the same way a puddle of salt water leaves a white ring after it dries.
New construction almost always shows some of this. Builders call it “new-building bloom,” and it comes from the water used to mix mortar and concrete during construction, working its way out over the following months. According to brick industry technical guidance, this kind of bloom often disappears on its own with normal weathering, sometimes taking up to about one year to fully clear. If your building is under a year old and the staining is light, patience and normal rain exposure may solve the problem without you lifting a brush.
Recurring efflorescence on an older structure tells a different story. That pattern usually means water is still getting in somewhere, not that residual construction moisture is finally working its way out.
A few visual cues help you sort one from the other:
- Powdery white bloom that brushes off easily usually signals fresh, soluble salts, the kind typical of new-building bloom or a recent moisture event.
- Hard, crusty deposits that resist brushing often mean the salts have converted to less soluble compounds, a sign of longer-term or repeated wetting.
- Staining concentrated at mortar joints points to water moving through the joints themselves, while staining spread across whole brick faces suggests moisture wicking through the masonry units.
- Deposits below a specific course or window often mark the exact height where water is entering or pooling.
What Causes Water Intrusion Behind Brick Efflorescence?
Efflorescence needs three things to form: soluble salts in the masonry or mortar, water to dissolve them, and a path for that water to evaporate at the surface. You cannot control the salts already baked into your brick and mortar, but you can almost always control the water.
The most common sources of that water include:
- Construction moisture trapped in mortar and masonry units during building, which works its way out over months as the structure cures and dries.
- Leaking or missing flashing above windows, doors, and rooflines, letting rainwater into the wall cavity instead of directing it back out.
- Failed gutters or downspouts that dump water directly against the base of a wall instead of away from the foundation.
- Irrigation spray hitting brick directly, day after day, which keeps the lower courses saturated far longer than rainfall alone would.
- Rising damp or groundwater wicking up from the foundation, especially in older buildings without a modern damp-proof course.
A short diagnostic walk-around usually narrows this down fast. Look at the flashing above any efflorescence, check the roofline and adjacent walls for signs of a leak working its way sideways, and note whether the staining lines up with a sprinkler head or a downspout discharge point. Let the wall dry for a few days, then check whether the staining returns in the same spot, which is often the clearest confirmation of an active moisture source.
If the source still isn’t obvious after that walk, don’t guess. Persistent, unexplained efflorescence sometimes calls for a moisture meter reading or a professional moisture investigation, particularly on multi-story buildings where the entry point could be well above the visible staining.
Pro Tip: Photograph every efflorescence patch with a date stamp before you clean it. If it comes back in the exact same spot within a few months, you’ve just confirmed an active leak, not lingering construction moisture.
How Do You Remove Efflorescence From Brick Step by Step?
Work from the gentlest method up, and stop as soon as the brick looks clean. Skipping straight to acid or a pressure washer is the single most common mistake homeowners make, and it’s the one most likely to leave permanent damage behind.
Step 1: Dry brush first, always.
Once the wall is fully dry, scrub the affected areas with a stiff nylon or natural-bristle brush, working in a circular motion to loosen the salt crystals. Sweep or vacuum up the loosened powder rather than letting it wash into the mortar joints. This single step, according to masonry industry guidance, resolves a large share of efflorescence cases with zero chemical exposure and zero risk to the brick surface.
- Never use a wire brush on face brick. Steel bristles scratch the surface and can embed metal particles that rust and stain later.
- Work small sections at a time so loosened salts don’t just resettle a few feet away.
Step 2: Rinse with clean water.
After brushing, flush the area with clean water from a garden hose, working from the top down in manageable sections. Let each section dry before deciding whether more work is needed. Avoid doing this in cold or wet weather. General Shale’s technical guidance warns that added moisture in damp or freezing conditions can push more salt migration to the surface rather than removing it, undoing your work before it even starts.
Step 3: Bring in a brick-safe cleaner for stubborn spots.
If brushing and rinsing leave visible residue, move to a pH-neutral or brick-labeled masonry cleaner rather than reaching for anything acidic. Follow the manufacturer’s dilution ratio and dwell time exactly, and rinse thoroughly until the runoff runs clear. Products formulated specifically for efflorescence tend to outperform general-purpose masonry cleaners here, since they’re designed to dissolve the specific salt compounds involved rather than just cut through surface dirt.
Step 4: Reserve acid washes for genuine last resorts.
Some efflorescence hardens into calcium carbonate crusts that shrug off brushing, water, and standard cleaners. In these cases, a dilute muriatic acid solution, generally in the 5 to 10 percent range, can work, but NCMA technical guidance is blunt about the tradeoffs: methods aggressive enough to remove hardened crusts can alter the brick’s texture or color, and you may need to treat an entire wall section to keep the finish looking uniform.
If you go this route, pre-wet the brick with clean water first so the acid doesn’t get pulled deep into dry, porous masonry. Test on a hidden patch, apply the diluted solution with a brush rather than pouring it on, neutralize with a baking soda solution afterward, and rinse thoroughly. This is genuinely risky work, and it’s exactly the point where many DIYers do more damage than the efflorescence itself was causing.
What to avoid entirely: wire brushes and high-pressure power washing. Technical guidance on cleaning brickwork is direct on this point: high-pressure water can force salts and moisture deeper into the masonry rather than removing them, while also eroding mortar joints that took decades to weather in properly. A soft, low-pressure rinse does the job without the collateral damage.
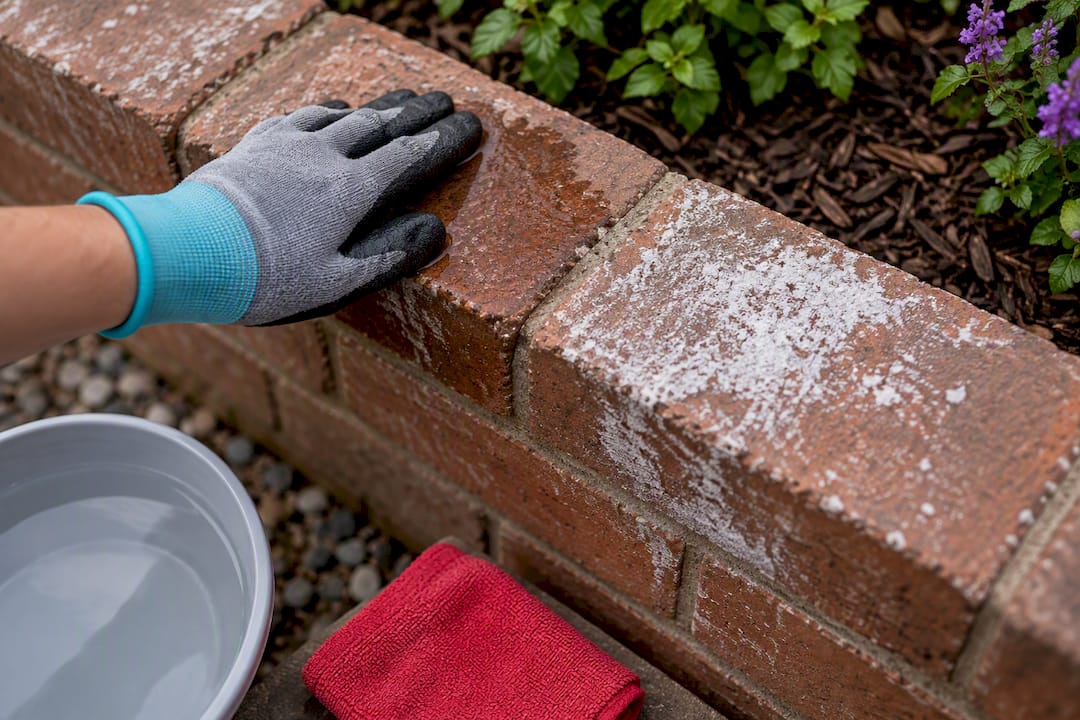
Pro Tip: If you’re unsure whether a stain is efflorescence or something else, like paint overspray or hard water mineral deposits, try water first. True efflorescence often lightens noticeably when wet, then reappears as it dries, a giveaway that plain sealer stains and other marks won’t show.
For anyone dealing with related exterior grime at the same time, the same low-risk-first logic applies to removing rust stains from concrete without resorting to acid, and to choosing the right window cleaning tools and PPE for masonry work around the same property.
How Do You Stop Efflorescence From Coming Back?
Cleaning brick without fixing the water problem behind it is a temporary win at best. The salts will keep finding their way back out until the moisture source is gone, so prevention work matters more than the cleaning method you choose.
Prioritize repairs in this order:
- Fix flashing, gutters, and downspouts first. These are the most common entry points, and they’re usually the cheapest to correct relative to the damage they prevent.
- Redirect splash-back and grading away from the foundation. Downspout extensions and regraded soil that slopes away from the wall stop water from pooling against the base course.
- Repoint deteriorated mortar and replace cracked units. Gaps in mortar joints are direct highways for water into the wall cavity.
- Check that weep holes and cavity drainage are clear. These small gaps at the base of brick veneer are designed to let trapped moisture escape; mulch, paint, or debris can block them silently for years.
Sealants and water repellents belong at the end of this list, not the beginning. According to brick industry guidance, applying a coating before the masonry is fully dry and before the moisture source is fixed can trap salts below the surface, causing what’s known as cryptoflorescence, a version of the same problem happening beneath the coating where you can’t see or brush it away. If you do apply a repellent, choose a breathable, vapor-permeable product made for brick, and only after the wall has dried completely and the underlying leak is resolved.
For efflorescence that keeps returning despite visible repairs, professional desalination methods, including saturated poultices or staged desalting treatments, along with lab testing to identify the exact salt compound, can address cases where surface fixes keep falling short.
Pro Tip: Mark repaired flashing and repointed joints with the repair date on your maintenance log. If efflorescence reappears in that exact spot within a season, the repair likely didn’t fully solve the leak, and it’s worth a second look before you clean it again.
When Should You Call a Professional for Efflorescence Removal?
Extensive hard crusting, efflorescence that keeps returning after you’ve addressed the obvious moisture sources, or mortar that’s visibly crumbling all point toward bringing in a professional rather than continuing to DIY. Multi-story buildings or hard-to-reach elevations add another reason: working safely at height with chemical cleaners isn’t a place to improvise.
A capable contractor typically works through a defined process:
- Diagnose the actual moisture source before touching a cleaner, since treating symptoms without fixing the cause wastes time and money.
- Test cleaning products on an inconspicuous panel to confirm the right concentration and dwell time for that specific brick.
- Use soft-wash, low-pressure techniques rather than defaulting to high-pressure equipment that risks driving salts deeper.
- Repoint compromised mortar as part of the same visit, rather than treating cleaning and repair as separate problems.
- Document the work, including before-and-after conditions and any repairs made, so there’s a record for future inspections.
E and R Cleaning Solutions approaches brick exteriors this way as a family-run pressure washing and exterior cleaning business, treating the diagnosis as seriously as the cleaning itself rather than just blasting a wall and calling it done.
What Safety Steps Matter Most Before You Clean?
Test your cleaning method on a small, hidden section of the wall first, and let it dry completely before judging the result. According to testing recommendations from masonry professionals, this single step catches discoloration or texture problems before they show up across an entire visible wall.
Beyond that test patch, a few precautions matter every time you work with masonry cleaners:
- Wear gloves and eye protection, especially with any proprietary cleaner or acid solution, and keep a hose nearby to flush skin or eyes immediately if contact happens.
- Protect nearby plants and hardscaping, and contain runoff so cleaning chemicals don’t drain into storm sewers or garden beds. Check your local rules on chemical disposal before you start.
- Skip cold or wet days entirely. Masonry needs time to dry, often around three days, before you can accurately judge whether cleaning actually worked.
- Never mix cleaning chemistries. Follow the manufacturer’s dilution and neutralization instructions exactly, and treat acid solutions as an absolute last resort, not a first move.
Pro Tip: Keep a box of baking soda on hand any time you’re working with acidic cleaners. It’s the fastest way to neutralize a spill on skin, clothing, or a section of brick that got more acid than intended.
How Often Should You Inspect Brick for Efflorescence?
Walk your brick exterior after any major storm and at least once a year as routine maintenance. That rhythm catches new staining while it’s still light and easy to brush off, rather than letting it harden into the crusts that force you into more aggressive cleaning later.
I’d push back on one common instinct: treating repeated cleaning as the solution. If you’re pressure washing or scrubbing the same wall section every few months, you don’t have a cleaning problem, you have an unfixed leak, and every cleaning cycle you do instead of fixing the flashing or grading is money and effort spent on the symptom. Light, occasional surface bloom on a newer structure is a reasonable DIY job. Recurring staining on the same spot, hard crusting, or anything tied to visible mortar deterioration is where I’d stop reaching for the brush and start reaching for a phone.
One habit pays off more than people expect: keep a simple log of when you cleaned, what you used, and what repairs you made nearby. That record turns a vague “it keeps coming back” into specific, dated evidence a contractor or future inspector can actually use to diagnose the real cause faster.
— Richard
Get a Professional Assessment for Stubborn Brick Stains
Some professional cleaning services offer property owners a faster, lower-risk path than the DIY acid-and-pressure-washer route this article just walked through, including a soft-wash and diagnostic approach that finds the moisture source instead of just blasting the symptom off the wall.

That distinction matters more than it sounds. A homeowner with a pressure washer can strip efflorescence off brick in an afternoon and drive salts deeper into the mortar in the process, or apply an acid solution at the wrong concentration and etch the brick face permanently. E and R Cleaning Solutions handles both window cleaning and pressure washing for residential and commercial properties, with pricing built around the specific job rather than a generic flat rate, so an inspection actually reflects what your wall needs instead of a one-size-fits-all treatment. For anyone weighing a hired option against DIY for after-construction cleanup, an after-builders cleaning service or a specialist like E and R Cleaning Solutions both take the guesswork out of new-building bloom versus an active leak.
If your brick shows recurring white staining, hard crusts, or you’re just not confident brushing and rinsing will be enough, request an inspection and get a diagnosis before the problem gets more expensive to fix.
Where to Find More Technical Guidance on Efflorescence
For deeper technical detail beyond this guide, the brick industry’s Technical Note 23A covers causes and prevention in full, while NCMA’s efflorescence guidance breaks down removal methods and chemical concentrations in more depth. The GSA/Inspectapedia procedure is worth reading if you’re dealing with recurring efflorescence and considering desalination. Always follow the specific manufacturer directions printed on any proprietary masonry cleaner you buy, since dilution ratios vary by product.
Sources
- Technical Note 23A — Brick industry guidance (GOBRICK)
- NCMA guidance on efflorescence control and removal
- General Shale technical guidance on efflorescence
FAQ
Can You Remove Efflorescence From Brick?
Yes, and most cases respond to dry brushing followed by a clean water rinse, with no chemicals needed at all. Stubborn or hardened deposits may need a brick-safe cleaner or, in rare cases, a carefully diluted acid wash applied by someone comfortable with the risk of altering the brick’s surface.
Can Efflorescence Be Removed Permanently?
Removal itself is usually permanent for that specific deposit, but efflorescence returns whenever moisture keeps finding its way into the wall. Repairing flashing, gutters, grading, and mortar joints is what actually stops the cycle, not repeated cleaning.
What Is the Most Effective Cleaner for Removing Brick Efflorescence?
A pH-neutral, brick-labeled masonry cleaner handles most stubborn efflorescence without risking the brick’s surface. For hardened calcium carbonate crusts, a dilute muriatic acid solution around 5% to 10% can work, but industry guidance treats it as a last resort due to the risk of texture and color changes.
Does CLR Get Rid of Efflorescence?
General household cleaners like CLR aren’t formulated for masonry and can react unpredictably with brick and mortar, so they’re not a reliable choice here. A cleaner specifically labeled for efflorescence or masonry use, applied at the manufacturer’s recommended dilution, gives more consistent and safer results.