
Family Pro Test Patch Rules to Pressure Wash Stucco for Homeowners
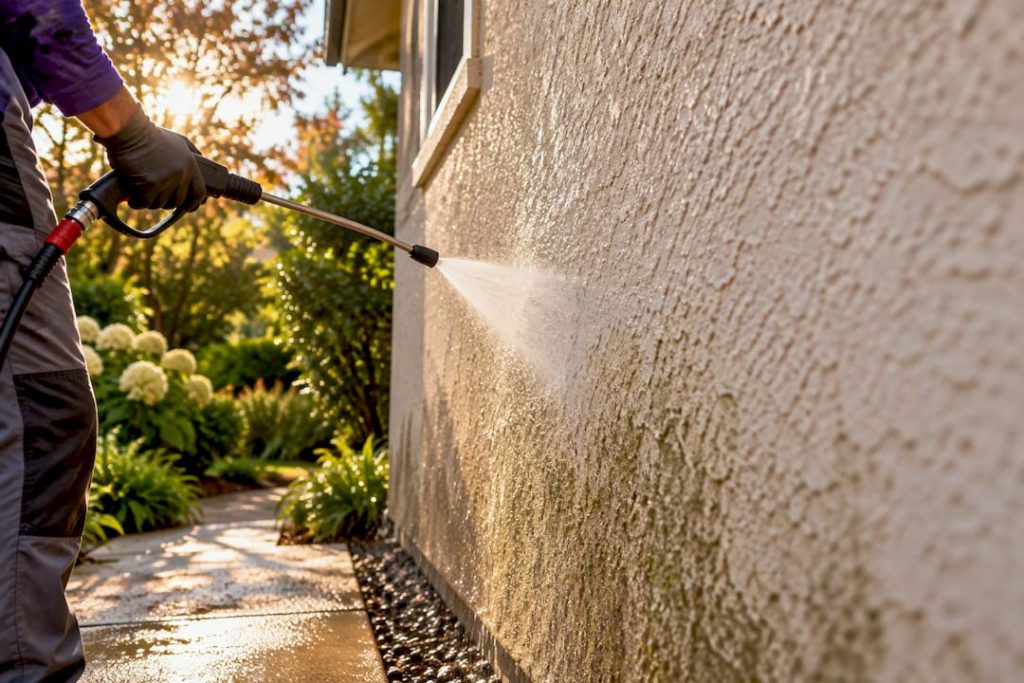
Yes, but only if you use low-pressure or soft-wash methods and confirm your stucco type first. Traditional cementitious stucco can usually handle a gentle wash once cracks are patched. EIFS, bottle-dash, and rock-dash finishes often can’t, and pushing water and pressure into the wrong wall assembly causes damage you won’t see until it’s too late. Inspect the surface, patch what needs patching, and test a hidden area before you commit to the whole wall.
TL;DR:
- Use low-pressure or soft-wash methods only after confirming your stucco type, with traditional cementitious stucco being the safest for gentle rinsing.
- Avoid pressure washing EIFS, bottle-dash, and rock-dash finishes, especially on compromised seams or damaged surfaces, to prevent trapping water behind the wall.
- Keep pressure washer nozzle at least 24 inches from the wall, use a wide 25 to 40 degree fan tip, and never aim directly at vulnerable areas like vents or fixtures.
- Prioritize chemical cleaning with dwell time over high mechanical force, especially for mildew or algae, and reapply solutions before increasing pressure.
- Inspect, patch, and fully cure any cracks or soft spots before cleaning, and always test a hidden section first to assess the wall’s tolerance and avoid costly damage.
Table of Contents
- Can You Pressure Wash Stucco? When It’s Appropriate and When to Avoid It
- Key Safety Variables: PSI, Nozzle, Distance, and Surface Condition
- Safer Methods: Soft Washing and Low-Pressure Rinsing Compared
- Prep and Repairs Before Cleaning: Inspection, Patching, and Drying Time
- Step-by-Step Safe Soft-Wash Cleaning Workflow
- Testing, Damage Signs, and What to Do If Something Goes Wrong
- When to Hire a Pro for Stucco Cleaning
- A Conservative Approach Wins on Stucco
- A Safer Path to a Cleaner Stucco Exterior
- Sources
- FAQ
Can You Pressure Wash Stucco? When It’s Appropriate and When to Avoid It
Not all stucco is built the same way, and that’s the part most DIY guides skip. Traditional three-coat cementitious stucco is a dense, rigid cement and sand mixture applied over a wire lath. It tolerates a controlled low-pressure rinse reasonably well once any cracking is addressed. One-coat acrylic stucco is thinner and more flexible, with a polymer-based finish coat that reacts differently to solvents and force than pure cement does.
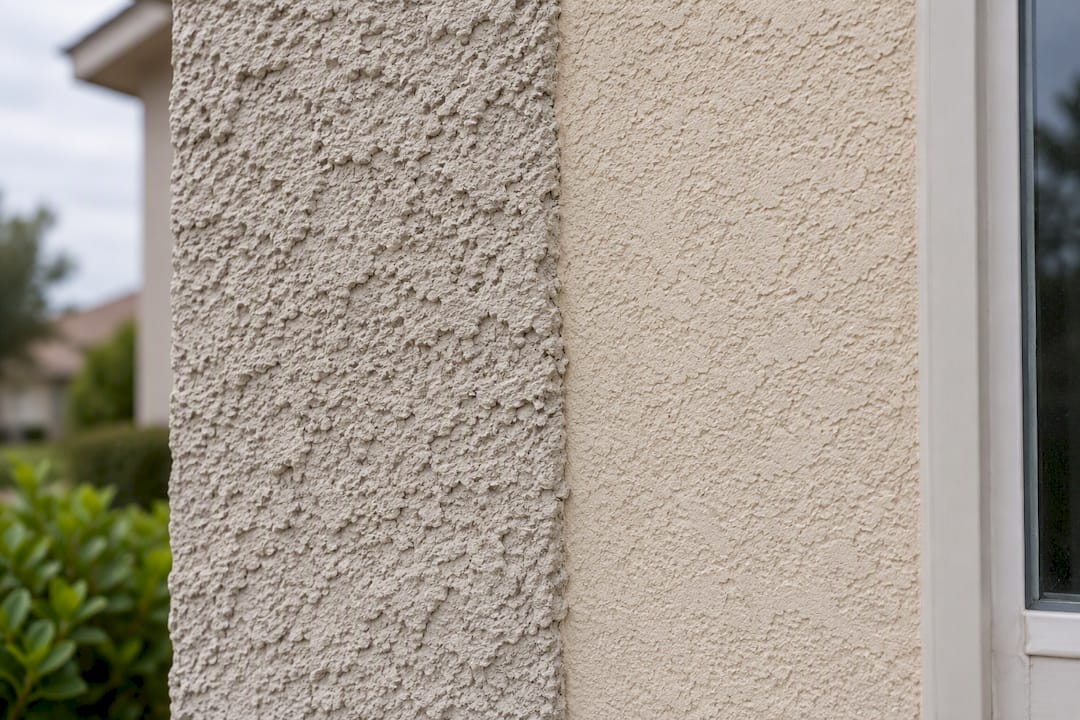
Then there’s EIFS (exterior insulation and finish system), bottle-dash, and rock-dash. These are a different category of risk entirely. EIFS wraps rigid foam insulation in a thin synthetic coating, and the whole system depends on drainage planes and a clean separation from water-sensitive materials behind the surface. Building-science research from Building America and the Department of Energy’s EERE program makes clear that washing decisions on these systems have to account for the whole wall assembly, not just what’s visible on the surface. Forcing water past a compromised seam in EIFS can cause it to get trapped behind the insulation with nowhere to go.
Skip DIY pressure washing and call a professional if you see any of these:
- You can’t identify whether your stucco is traditional, acrylic, or EIFS
- The finish has a rough, pebbly bottle-dash or rock-dash texture
- You notice staining, bubbling, or soft spots that suggest trapped moisture already
- The wall is multi-story or has sections you can’t safely reach at a controlled angle
Key Safety Variables: PSI, Nozzle, Distance, and Surface Condition
PSI gets all the attention, but it’s only one piece of the equation. A pressure washer’s actual impact on a wall depends on nozzle angle, distance from the surface, how fast you move the wand, and the condition of the stucco itself. Two machines set to the same PSI can produce wildly different results depending on how the operator handles the wand.
Bob Vila’s guidance on pressure washing puts traditional stucco jobs in the 1,200 to 1,500 PSI range with a wide 25 to 30 degree nozzle, but explicitly warns against pressure washing delicate bottle-dash and rock-dash finishes at all, since the textured surface can shear off under force that a smooth wall would tolerate fine.
PSI alone doesn’t tell the whole story. A narrow nozzle at 1,200 PSI held six inches from the wall can gouge stucco that would come away clean at 1,500 PSI through a wide fan tip held two feet back. The nozzle and distance change everything.
Keep these operational rules in mind every time the trigger is pulled:
- Use a 25 to 40 degree fan tip, never anything narrower, on any stucco surface
- Start with the nozzle at least 24 inches from the wall and adjust from there based on results
- Keep the wand moving constantly. Never let the stream sit in one spot
- Never use a zero-degree “pencil jet” tip on stucco under any circumstances
- Avoid aiming directly at window seals, vents, light fixtures, or any penetration in the wall
Bob Vila’s dos and don’ts guide reinforces the same point: increase cleaning strength through dwell time and approved cleaners before you ever reach for more mechanical force.
Safer Methods: Soft Washing and Low-Pressure Rinsing Compared
Soft washing is the default recommendation for stucco, and for good reason. It swaps raw pressure for chemistry: apply an approved cleaning solution, let it dwell long enough to break down organic growth and grime, then rinse it away at low pressure. Lowe’s how-to guidance on cleaning stucco recommends exactly this approach, favoring low-pressure settings and a wide spray angle over anything resembling a high-pressure blast.
A straight low-pressure rinse, with no cleaning chemistry involved, works fine on sound traditional stucco that’s simply dusty or lightly soiled and shows no signs of needed repairs. But once you’re dealing with mildew, algae streaking, or ground-in dirt, water alone won’t cut it no matter how long you stand there with the wand.
Here’s how the two methods split by contaminant:
- Mildew and algae: chemistry does the real work here. A soft-wash cleaner with the right dwell time breaks the biological bond to the surface far more reliably than mechanical force
- Surface dirt and dust: a plain low-pressure rinse is usually enough, no cleaner needed
- Peeling paint prep: this calls for more aggressive mechanical action, and it’s exactly the kind of job where a wrong call on pressure does real damage. When in doubt, get a professional opinion first
Pro Tip: If a stain isn’t lifting after a full dwell cycle, resist the urge to crank the pressure. Reapply the cleaner and give it a second dwell period instead. Chemistry outperforms force on stucco almost every time, and it won’t leave a mark you can’t undo.
Prep and Repairs Before Cleaning: Inspection, Patching, and Drying Time
Cleaning a cracked wall is how small problems become expensive ones. Water finds every gap you didn’t patch, and pressure washing pushes it in faster than rain ever would. Walk the entire wall before you do anything else.
- Inspect every surface closely. Look for cracks, loose or delaminating patches, failed caulk or sealant around windows and trim, soft or spongy spots, and any staining that suggests water has already gotten in behind the finish.
- Repair anything you find before you wash. Follow the repair product’s own instructions for mixing and application. QUIKRETE’s stucco crack repair datasheet specifies surface and temperature conditions that matter more than most homeowners assume.
- Let patches cure fully, not just surface-dry. Ferguson Home’s guidance suggests waiting roughly a week before exposing fresh patches to washing, since a surface that feels dry to the touch can still be curing underneath.
- Protect everything around the work area. Cover vegetation, close windows, tape over vents, and shut off or cover any exterior electrical fixtures before you start.
- Rinse plants after you finish. Cleaning solution runoff can burn foliage even after it’s diluted, so give landscaping a plain water rinse once the job’s done.
Step-by-Step Safe Soft-Wash Cleaning Workflow
This is the sequence to follow, whether you’re doing the work yourself or briefing a hired crew on exactly what you expect.
- Pick a hidden test area first. A side wall section near a downspout or behind a shrub works well. Apply your full process there and inspect results before touching the rest of the house.
- Mix your cleaner at a conservative, manufacturer-recommended concentration. Stronger isn’t better here. Over-concentrated solutions can bleach or discolor finishes.
- Apply from the bottom up. Ferguson Home’s procedural notes recommend this order to avoid streaking as runoff drips down an already-cleaned section.
- Let it dwell 5 to 10 minutes. Keep the surface wet during this window. A cleaner that dries out on the wall stops working and can leave residue behind.
- Rinse top to bottom at low pressure, using the same wide-fan nozzle and 24-inch stand-off distance discussed earlier.
- Check the test area before scaling up. Look for any texture change, discoloration, or softness before you move on to the rest of the wall.
Equipment worth having on hand: a soft-wash sprayer or a low-pressure rig capable of gentle output, a wide-angle fan nozzle, an extension lance for second-story reach, and basic PPE, including eye protection and gloves rated for the cleaning chemical you’re using.
Pro Tip: If you’re unsure whether to increase pressure or wait longer, wait longer. A second dwell cycle costs you ten minutes. A gouge in acrylic stucco costs you a repair bill.
If at any point the wall shows something other than getting cleaner, stop immediately and reassess before continuing.
Testing, Damage Signs, and What to Do If Something Goes Wrong
Your test patch is telling you something specific if you know what to look for. Run your fingers across the dried test area and check for texture loss, a chalky or uneven color shift, or any spot that feels softer than the surrounding wall.
Watch for these damage patterns, and what they usually mean:
- Gouging or pitting signals the pressure or nozzle angle was too aggressive for that finish, and it’s likely permanent without a patch
- Paint or coating stripped away in patches often means the coating was already failing, and pressure just exposed it faster
- Bubbling, staining, or dampness showing up days later points to water getting behind the finish, which is the exact wall-assembly risk building-science guidance warns about with EIFS and reservoir claddings
If you see any of these, stop washing that section immediately. Let the area dry and ventilate fully before deciding on next steps. Minor cosmetic damage on traditional stucco can sometimes be addressed with patch products following their datasheet cure times, but anything involving water intrusion behind the surface calls for a professional evaluation before you do anything else.
When to Hire a Pro for Stucco Cleaning
Certain situations call for a professional the moment you spot them: you can’t confirm whether your wall is EIFS, you see existing water staining, the building is multi-story, or parts of the wall are hard to reach at a safe, consistent angle. A professional assessment typically starts by identifying the stucco system, runs test patches in a couple of spots, and recommends a method matched to what that specific wall can handle, flagging any repairs needed before cleaning begins.
E and R Cleaning Solutions approaches stucco the same conservative way outlined throughout this guide: identify the system first, test before committing, and choose the least aggressive method that actually gets the job done. The pressure washing siding guide and soft wash siding guide walk through the concentration and procedure details in more depth. If you’re vetting any provider before hiring, this guide on onboarding an exterior cleaning service is worth a look, and if there’s real water intrusion or cladding damage involved, a restoration specialist like Gepetto Millworks may be the more appropriate call before any cleaning happens at all.
A Conservative Approach Wins on Stucco
Most stucco damage stories start the same way: someone assumed more pressure would just mean a cleaner wall faster. Stucco doesn’t reward that instinct. The safest operators I know default to the gentlest method that will actually lift the stain, and they only step up force after a test patch proves the wall can take it.
If there’s one habit worth adopting, it’s leaning on dwell time before you ever touch the pressure dial. Let the cleaner sit longer, reapply if needed, and treat mechanical force as your last resort, not your first move.
— Richard
A Safer Path to a Cleaner Stucco Exterior
Consider choosing a professional cleaning service that inspects your stucco type before using equipment, tests a hidden area first, and offers transparent pricing without inflating the scope. That’s the difference between a weekend project that might go wrong and a job done by someone who’s already worked through the substrate questions this guide just walked you through.

Whether your stucco needs a straightforward low-pressure rinse or a full soft-wash treatment with repair work first, the window cleaning and pressure washing services page is the place to start. Request an assessment, get a clear read on what your specific wall can safely handle, and get a quote before any water touches your walls.
Sources
- How to Pressure-Wash a House: A Step-by-Step Guide — BobVila
- How to Clean Stucco Like a Pro — Lowe’s
- How to pressure wash a stucco surface — Ferguson Home
- Evaluating an Exterior Insulation and Finish System for Deep Energy Retrofits — Building America / EERE
FAQ
What PSI should you use to pressure wash stucco?
Traditional cementitious stucco can typically handle around 1,200 to 1,500 PSI with a wide 25 to 30 degree nozzle, but that range doesn’t apply to bottle-dash, rock-dash, or EIFS finishes, which shouldn’t be pressure washed at those settings at all. Nozzle angle and distance from the wall matter as much as the PSI number itself.
What is the best way to soft wash stucco?
Apply an approved cleaning solution from the bottom up, let it dwell for 5 to 10 minutes while staying wet, then rinse top to bottom at low pressure using a wide fan nozzle. Lowe’s recommends this low-pressure approach over high-pressure blasting for nearly all stucco types.
What surfaces should you avoid power washing?
Avoid high pressure on bottle-dash and rock-dash stucco, EIFS systems, delicate painted masonry, and any wall with existing cracks, soft spots, or unpatched damage. Aged or unsealed mortar joints and areas around windows, vents, and electrical fixtures also call for a gentler approach or a professional look first.
What is the best way to clean exterior stucco?
For most stucco, a soft-wash approach using an approved cleaner and low-pressure rinse gets better, safer results than high-pressure blasting. Start by identifying your stucco type, patch any cracks and let them cure, then test a hidden area before treating the whole wall, or bring in a professional through E and R Cleaning Solutions if the substrate is uncertain.