Stop Chalky Oxidation on Vinyl Siding, Homeowners: Chemistry First Fix
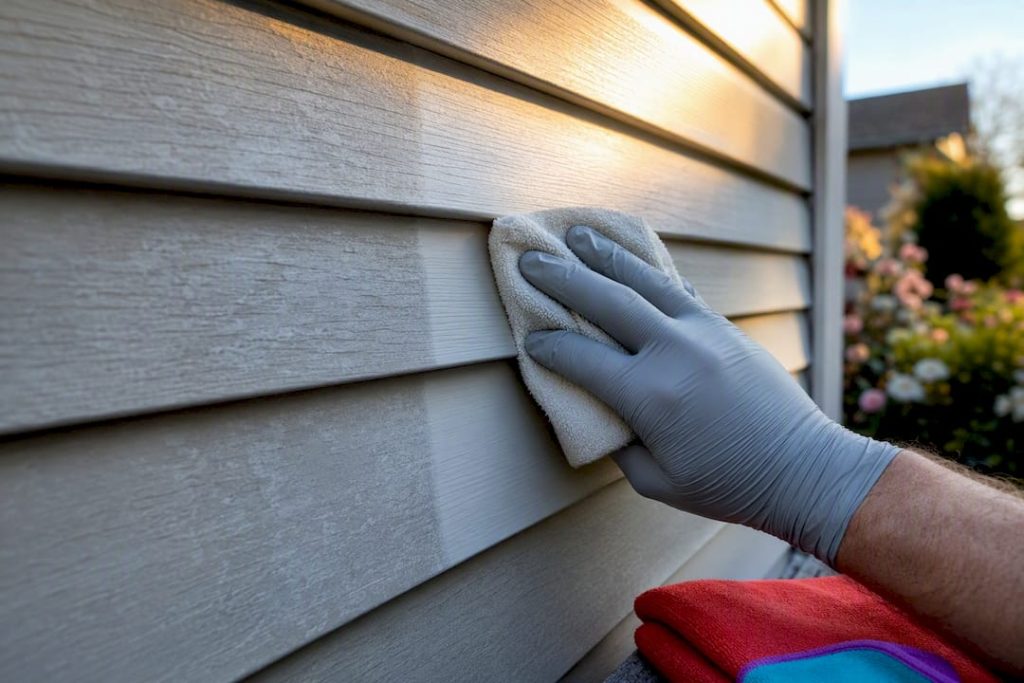
That chalky, faded film on your siding is usually oxidation, and the fastest way to confirm it is a finger swipe. Rub a section with your palm; if a dusty white residue transfers onto your skin, you’re dealing with UV-driven surface breakdown, not dirt or mildew. Light-to-moderate cases respond well to a chemistry-first soft wash with a dedicated oxidation remover. Severe, uneven, or long-neglected siding may need professional restoration or a full replacement.
TL;DR:
- Oxidation on vinyl siding is confirmed by a powdery, chalk-like residue that transfers onto fingertips after a finger swipe, indicating surface degradation.
- Severe or uneven oxidation often requires professional restoration or siding replacement, as cleaning cannot reverse structural pigment loss.
- Chemically removing oxidation with a dedicated, no-scrub soft wash is effective when done on overcast days, with proper testing and gentle rinsing techniques.
- Pressure washing or aggressive scrubbing can cause irreversible damage and should be avoided in favor of chemical treatment and careful inspection.
- Regular cleaning every one to two years and landscaping practices can slow oxidation, but once pigment loss occurs, siding replacement is typically the only solution.
Table of Contents
- How Do You Know If It’s Oxidation on Vinyl Siding?
- Why Does Vinyl Siding Oxidize in the First Place?
- How Do You Safely Remove Oxidation From Vinyl Siding?
- Should You Paint Oxidized Siding or Replace It?
- How Often Should You Clean Vinyl Siding to Prevent Oxidation?
- What Do Pros See That Homeowners Usually Miss?
- What Actually Matters Here (And What Gets Overhyped)
- Get Oxidation Off Your Siding Without the Guesswork
- Sources
How Do You Know If It’s Oxidation on Vinyl Siding?
The finger-swipe test settles most doubts. Run your hand across a dull section of siding and check your fingertips. A powdery, chalk-like coating means the surface polymer and pigment have started to break down under sun exposure. That residue is the vinyl itself degrading, not a layer of grime sitting on top of it.
A few other visual cues confirm the diagnosis:
- Faded, uneven color that looks worse on south- and west-facing walls, where UV exposure runs highest.
- A dull, matte finish replacing the original gloss, even in spots that get rinsed regularly by rain.
- No response to plain water, unlike ordinary dirt, which usually rinses away without leaving a residue.
Mildew and algae are the other usual suspects, but they look different up close. Mold shows up as green or black splotches, often in shaded, damp corners rather than sun-baked walls. If the discoloration wipes off wet without any chalky feel, you’re probably looking at surface dirt or biological growth, not oxidation on vinyl siding. Homeowner reports suggest oxidation can appear on siding as young as five or six years old, especially on the sunniest exposures, so age alone doesn’t rule it out.
Why Does Vinyl Siding Oxidize in the First Place?
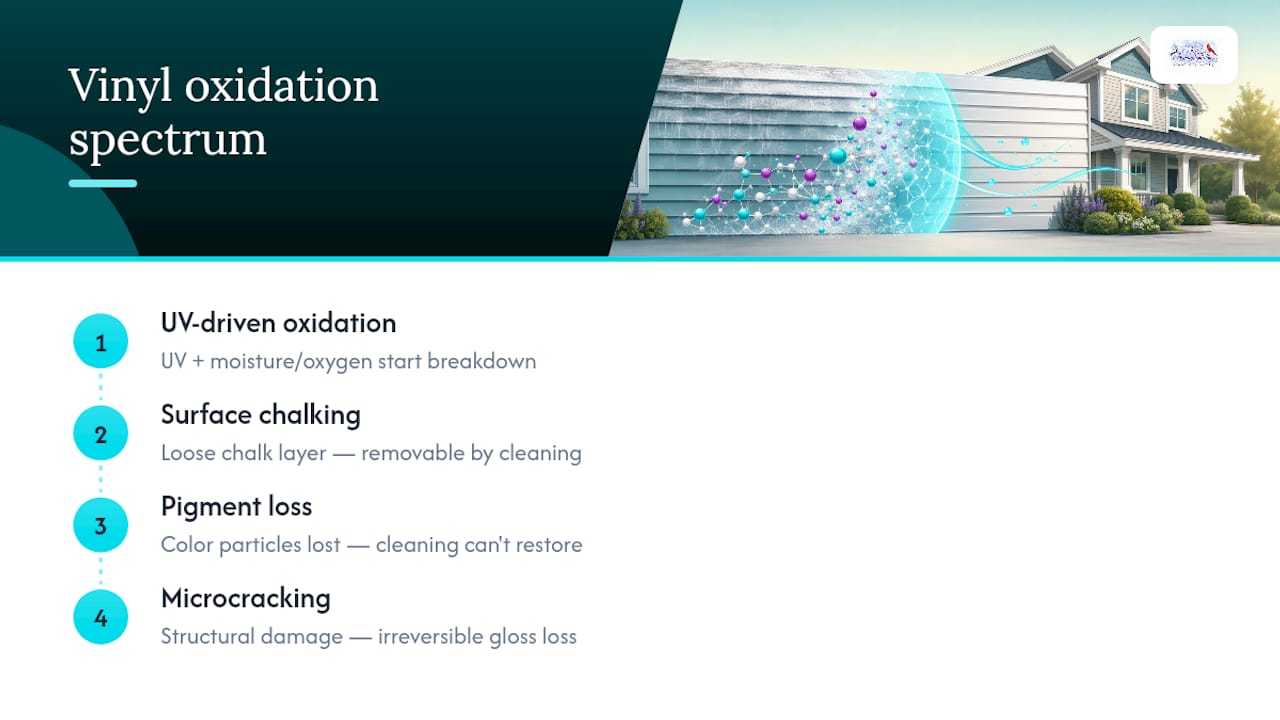
Sunlight is the main driver. Ultraviolet radiation triggers a process called photo-oxidation, breaking down the polymer chains and pigments that give vinyl siding its color and sheen. Moisture and oxygen speed up that breakdown, which is why homes in humid, sun-heavy climates tend to chalk faster than homes in drier, shadier settings.
A NIST technical note on vinyl siding weathering found measurable chemical shifts in oxidized surfaces, including increased carbonyl signals detected through spectroscopy and changes tied to titanium dioxide (TiO2) content, one of the additives manufacturers use for color and UV resistance. Fillers like calcium carbonate also influence how a panel chalks over time, and NIST’s research on weathering and formulation shows darker, more heavily pigmented siding often shows visible damage sooner than lighter shades.
That research also points to a practical limit homeowners need to hear: once pigment loss and microcracking set in, cleaning cannot rebuild lost color or restore original gloss. You can remove the chalky layer sitting on the surface. You cannot reverse structural degradation underneath it. That distinction is what separates a successful soft wash from a wasted afternoon.
How Do You Safely Remove Oxidation From Vinyl Siding?
Skip the pressure washer and skip the scrub brush. Both of those instincts cause more damage than the oxidation itself. The reliable method is chemistry-first: let a solution dissolve the chalky layer, then rinse it away.
Before you start:
- Pick an overcast day or work in shade. Direct sun causes cleaning solutions to dry too fast, which halts the chemical reaction and leaves streaks.
- Wet down nearby plants and shrubs to protect them from runoff.
- Test your chosen cleaner on a hidden section first and wait a few minutes to check for discoloration.
The removal steps:
- Pre-rinse the wall with a garden hose to knock off loose dust and debris.
- Apply an oxidation remover or a TSP substitute across the panel, working from the bottom up to avoid streaking on dry siding above the wet line.
- Let it dwell. Give the solution time to break down the chalk. If it starts to dry before you rinse, mist it lightly to keep the reaction going. Southeast Softwash’s no-scrub method treats this dwell time as the entire point of the process, not an optional pause.
- Agitate lightly only if needed, using a soft brush or sponge, never a stiff-bristle scrub pad.
- Rinse top to bottom with a garden hose or a low-pressure, wide-fan nozzle.
- Re-treat heavy patches that still look chalky after the first pass rather than pushing harder with the same application.
Homemade mixes using a TSP substitute or a mild acid and surfactant blend can work for small, light jobs, but they tend to need repeat applications and give less consistent results than a purpose-built remover.
Pro Tip: Keep your nozzle on a wide fan setting and stay at least a foot or two from the surface. A concentrated stream digs uneven grooves into oxidized vinyl, a defect known as tiger stripes, and it’s permanent once it happens.
Call in a professional if you’re dealing with a multi-story home, large sections of uneven oxidation, ladder work you’re not comfortable with, or discoloration that persists after a correct cleaning attempt. At that point, the issue usually isn’t technique. It’s how far the degradation has already progressed.
Should You Paint Oxidized Siding or Replace It?
Painting over vinyl siding without fully removing the chalk first is one of the most common ways homeowners waste money. Paint needs a clean, sound surface to bond to, and any leftover chalky residue acts like a release layer that causes peeling within months.
Before committing to paint, run a simple check:
- Clean a small test patch thoroughly and let it dry completely.
- Press a strip of painter’s tape onto the cleaned area, then pull it off. If chalk transfers to the tape, the surface still isn’t ready.
- Look closely for microcracks, pitting, or a brittle feel when you flex the panel slightly.
Professionals test small panels for adhesion and structural soundness before recommending paint, and when a test patch shows insufficient substrate integrity, replacement becomes the more honest recommendation, according to the same NIST findings on vinyl weathering. If cleaned sections still look dull and faded with no color recovery, or the material feels brittle rather than flexible, that panel has likely passed the point where cleaning or paint can help. Replacement is the realistic fix at that stage, not another round of cleaner.
How Often Should You Clean Vinyl Siding to Prevent Oxidation?
You can’t stop UV exposure, but you can slow how fast it turns into a chalky mess. Consistency matters more than intensity here.
- Schedule routine soft washing every 1 to 2 years. Regular cleaning removes surface pollutants and grime that accelerate oxidation before it sets in, according to contractor guidance on siding maintenance.
- Trim back plants and shrubs touching the siding to improve airflow and cut down on trapped moisture.
- Keep gutters clear so overflow doesn’t run down the wall and create damp streaks that trap dirt.
- Consider a restorer coating on cleaned siding for extra protection, but treat it as a supplement, not a permanent fix. Coatings buy time; they don’t stop UV breakdown from continuing underneath.
The same landscaping principles that protect vinyl fencing from seasonal wear apply just as well to siding: less standing moisture, less trapped debris, less accelerated aging.
What Do Pros See That Homeowners Usually Miss?
Some professional exterior cleaning businesses approach every oxidized wall the same way: diagnose first, apply chemistry-first soft washing second, spot-restore trouble areas, then do a follow-up inspection before calling the job done. That order matters more than most people expect.
The three mistakes we see most often on jobs we take over from a failed DIY attempt: pressure damage from a nozzle held too close, cleaner left to dry mid-dwell because nobody was watching the clock, and plants left unprotected from runoff. None of those are hard to avoid. They’re just easy to rush.
If you’re testing a method yourself, treat one small panel as a trial run before committing to the whole house. It’s the same discipline a professional applies before touching a full exterior.
What Actually Matters Here (And What Gets Overhyped)
Most advice on oxidized siding treats it like a one-size-fits-all cleaning problem. It isn’t. The material science makes clear that oxidation exists on a spectrum, from light surface chalk that a soft wash handles easily to structural pigment loss that no amount of scrubbing or chemistry will undo. Conventional advice tends to skip that second half entirely, promising restoration where none is realistically possible.
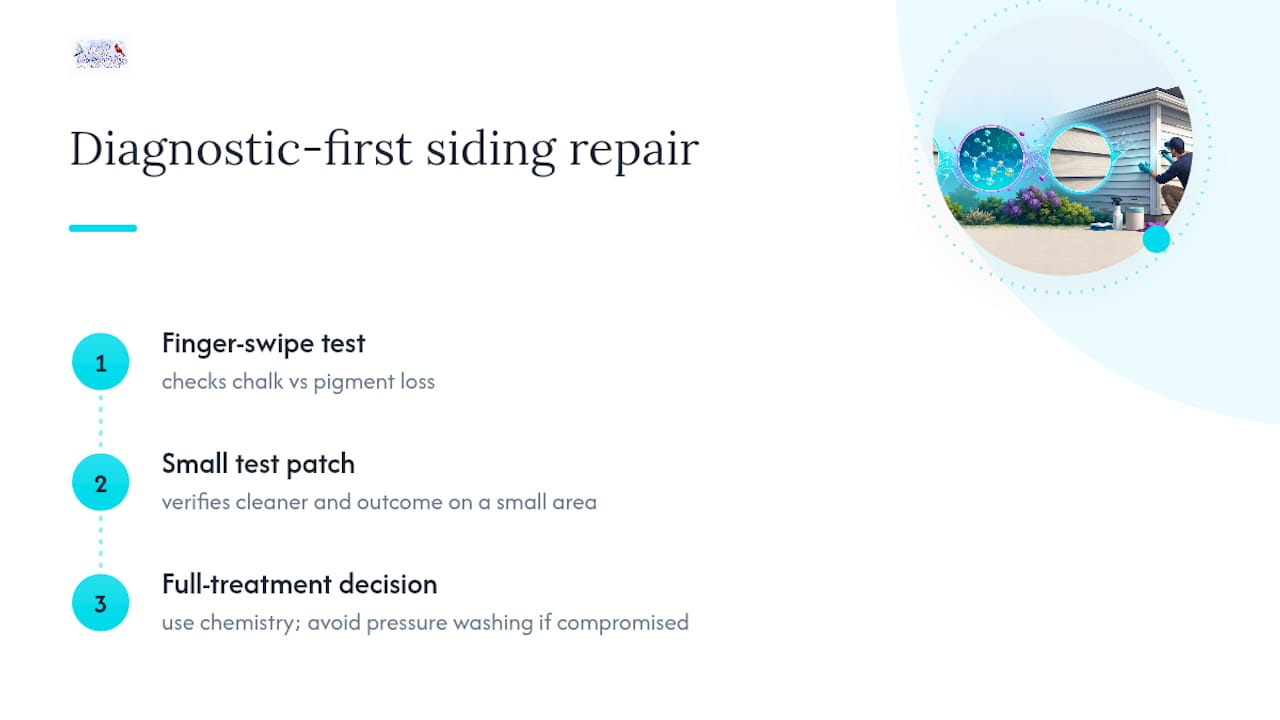
The bigger mistake I see homeowners make isn’t choosing the wrong cleaner. It’s skipping the diagnostic step and jumping straight to a pressure washer, because it feels faster and more thorough. It’s neither. Pressure creates uneven damage on a surface that’s already compromised, turning a fixable problem into a permanent one.
Prioritize the finger-swipe test, then a small test patch, before you touch a whole wall. That sequence costs you ten minutes and saves you from an expensive redo. Chemistry beats force here, every time.
— Richard
Get Oxidation Off Your Siding Without the Guesswork
Diagnosing oxidation correctly and matching it to the right chemistry is the part most DIY attempts get wrong, and professional exterior cleaning businesses specialize in this. Such teams handle oxidation removal, soft washing, and paint-prep cleaning with the same chemistry-first, no-scrub approach outlined above, scaled for whole-house jobs, multi-story homes, and severe or uneven cases DIY methods can’t safely reach.

If your siding shows patchy oxidation across multiple walls, sits above a second story, or didn’t respond fully to a cleaning attempt, that’s the signal to bring in a pro rather than keep experimenting. Professional cleaners apply the correct oxidation remover, control dwell time properly, and rinse at safe pressure to avoid the tiger-striping that ruins DIY jobs. Check out the residential cleaning process to see how a job is scoped and scheduled, or get a custom estimate for your siding directly from the main service page to get a straightforward quote before oxidation gets worse.
Sources
For deeper technical grounding, NIST’s technical note on vinyl siding weathering covers the material-science side. For hands-on method details, see the no-scrub removal guide and safe cleaning practices for chalky siding.
- Effects of Weathering and Formulation on the Properties of Vinyl Siding
- How to Remove Oxidation on Vinyl Siding, Without Brushing – Southeast Softwash